Refer to https://dortania.github.io/OpenCore-Install-Guide/installer-guide/mac-install.html
下载镜像
Approach 1 - Munki’s InstallInstallMacOS utility
In order to run it, just copy and paste the below command in a terminal window:
mkdir -p ~/macOS-installer && cd ~/macOS-installer && curl https://raw.githubusercontent.com/munki/macadmin-scripts/main/installinstallmacos.py > installinstallmacos.py && sudo python installinstallmacos.py

As you can see, we get a nice list of macOS installers. If you need a particular versions of macOS, you can select it by typing the number next to it. For this example we’ll choose 10:

This is going to take a while as we’re downloading the entire 8GB+ macOS installer, so it’s highly recommended to read the rest of the guide while you wait.
Once finished, you’ll find in your ~/macOS-Installer/ folder a DMG containing the macOS Installer, called Install_macOS_11.1-20C69.dmg for example. Mount it and you’ll find the installer application.
- Note: We recommend to move the Install macOS.app into the
/Applicationsfolder, as we’ll be executing commands from there. - Note 2: Running Cmd+Shift+G in Finder will allow you to easily jump to
~/macOS-installer


Approach 2 -Command Line Software Update Utility
Open a terminal window then copy and paste the below command:
softwareupdate --list-full-installers;echo;echo "Please enter version number you wish to download:";read;$(if [ -n "$REPLY" ]; then; echo "softwareupdate --fetch-full-installer --full-installer-version "$REPLY; fi);

格式化U盘
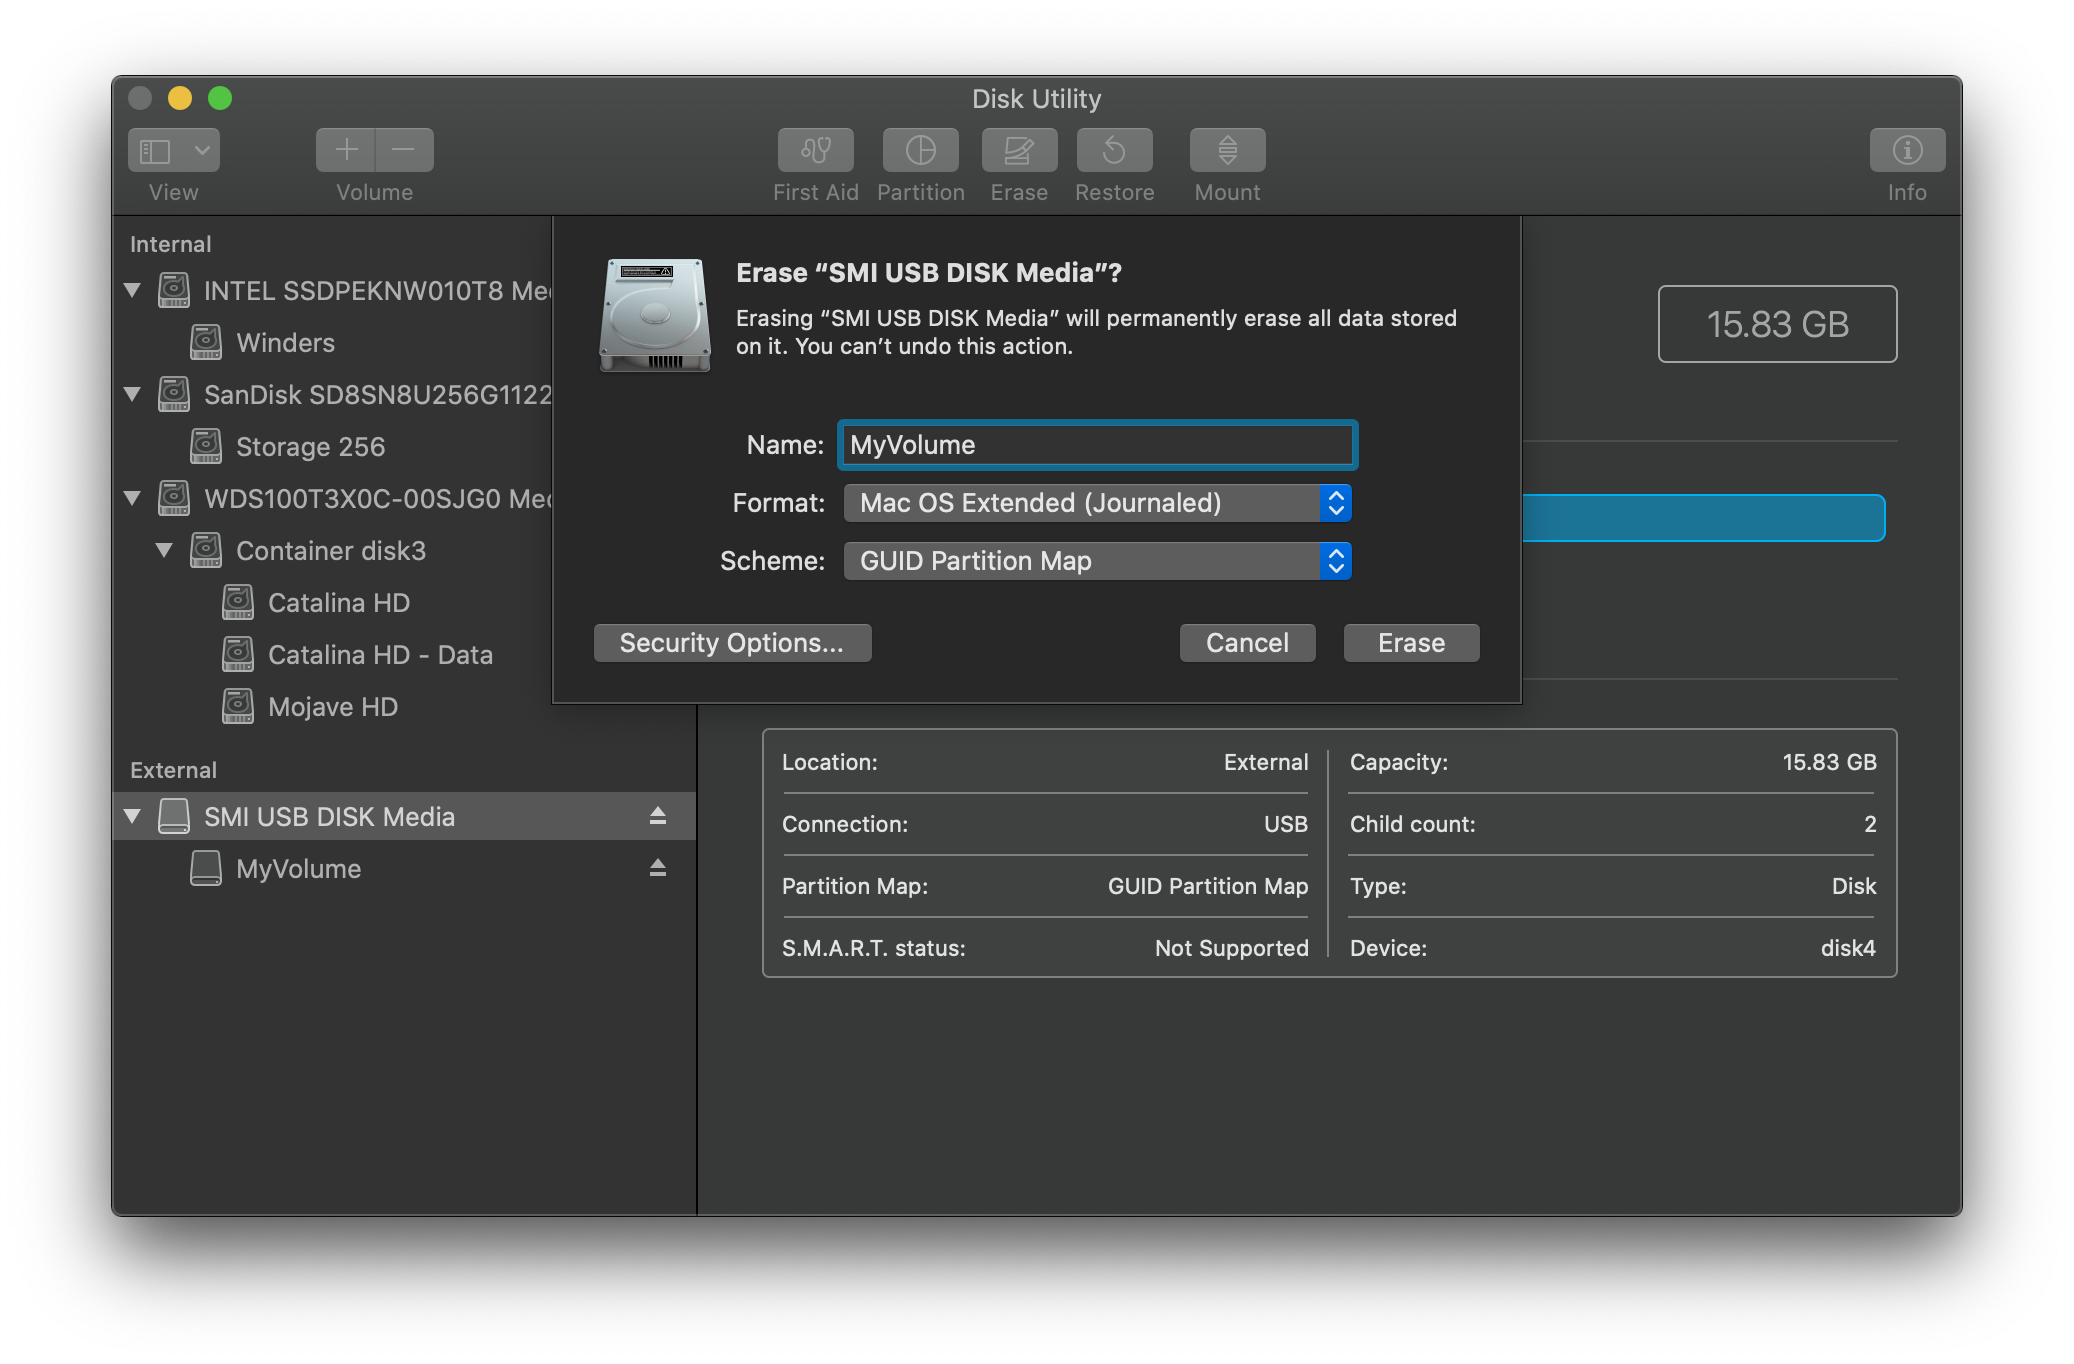
Now we’ll be formatting the USB to prep for both the macOS installer and OpenCore. We’ll want to use macOS Extended (HFS+) with a GUID partition map. This will create two partitions: the main MyVolume and a second called EFI which is used as a boot partition where your firmware will check for boot files.
- Note: By default, Disk Utility only shows partitions – press Cmd/Win+2 to show all devices (alternatively you can press the View button)
刷入U盘
Next run the createinstallmedia command provided by Apple (opens new window). Note that the command is made for USB’s formatted with the name MyVolume:
sudo /Applications/Install\ macOS\ Big\ Sur.app/Contents/Resources/createinstallmedia --volume /Volumes/MyVolume
This will take some time so you may want to grab a coffee or continue reading the guide (to be fair you really shouldn’t be following this guide step by step without reading the whole thing first).
Setting up OpenCore’s EFI environment
$ diskutil list

# mount your ESF
$ sudo diskutil mount /dev/<your EFI IDENTIFIER>
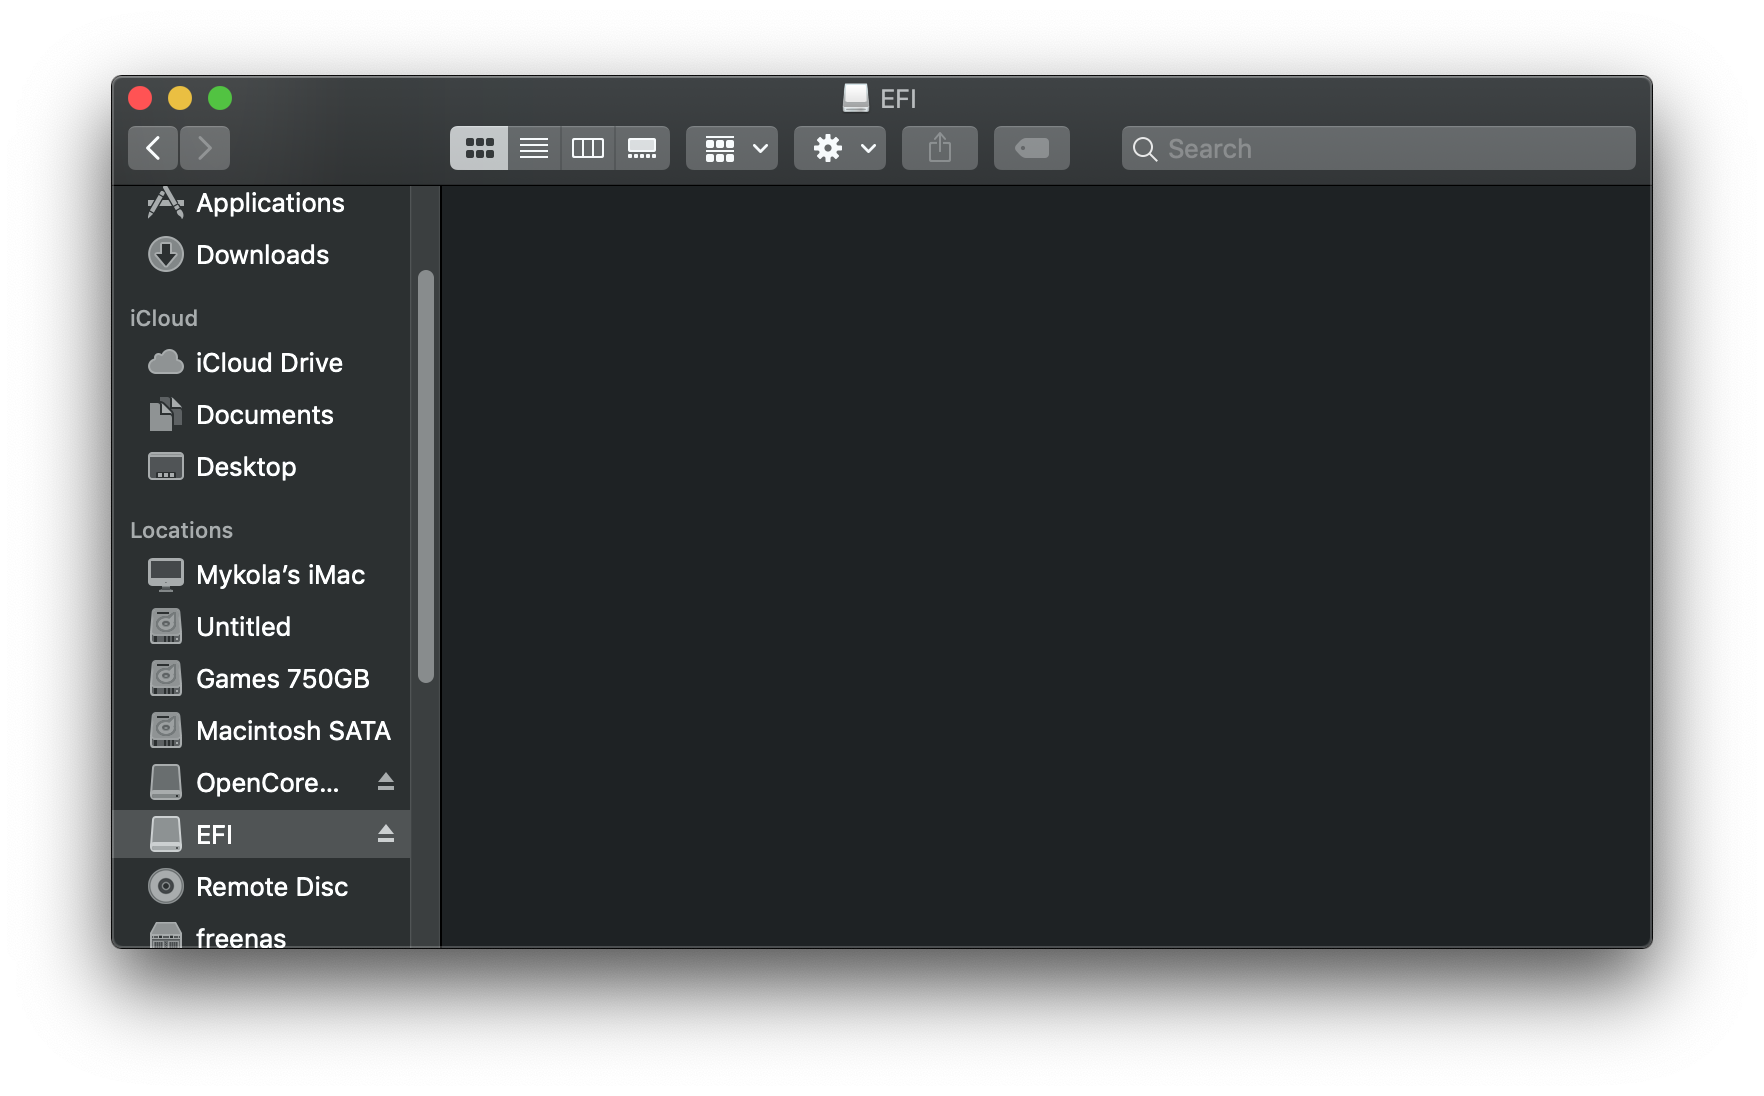
You’ll notice that once we open the EFI partition, it’s empty. This is where the fun begins.
Refer to https://swsmile.info/post/hackintosh-build-usb-flash-drive/
通过 dmg 制作 iso 镜像
创建空的 cdr 镜像文件(ISO)
# 创建一个大小为18GB的 cdr
$ hdiutil create -o /tmp/Sonoma.cdr -size 18000m -layout SPUD -fs HFS+J
把这个cdr文件挂载到位于 /Volumes/install_build 的虚拟磁盘:
# first time to run
$ sudo hdiutil attach /tmp/Sonoma.cdr.dmg -noverify -mountpoint /Volumes/Sonoma
/dev/disk8          	Apple_partition_scheme
/dev/disk8s1        	Apple_partition_map
/dev/disk8s2        	Apple_HFS                      	/Volumes/Ventura2
Now will use the Createinstallmedia command to make the disk image bootable with macOS Sonoma.
$ sudo /Volumes/Install\ macOS\ Sonoma/Install\ macOS\ Sonoma.app/Contents/Resources/createinstallmedia  --volume /Volumes/Sonoma --nointeraction
Erasing disk: 0%... 10%... 20%... 30%... 100%
Copying essential files...
Copying the macOS RecoveryOS...
Making disk bootable...
Copying to disk: 0%... 10%... 20%... 30%... 100%
Install media now available at "/Volumes/Install macOS Sonoma 2"
Convert and rename the Disk Image to ISO
$ hdiutil convert /tmp/Sonoma.cdr.dmg -format UDTO -o ~/Downloads/Sonoma
Reading Driver Descriptor Map (DDM : 0)…
Reading Apple (Apple_partition_map : 1)…
Reading  (Apple_Free : 2)…
Reading disk image (Apple_HFS : 3)…
.......................................................................................................
Elapsed Time: 29.600s
Speed: 608.1MB/s
Savings: 0.0%
created: /Users/weishi/Downloads/Sonoma.cdr
$ mv -v Downloads/Sonoma.cdr Downloads/Sonoma.iso
$ sudo rm -fv /tmp/Sonoma.cdr.dmg
至此全部完成,经过测试,桌面上的“Sonoma.iso”和可以用来加载在VMWare虚拟机光驱中安装苹果系统,亦可以用来克隆到U盘做安装盘。
Ref
Reference
- https://github.com/corpnewt/gibMacOS
- https://support.apple.com/en-us/HT201372
- https://dortania.github.io/OpenCore-Install-Guide/installer-guide/mac-install.html