Build ISO Mirrnor
参考 https://swsmile.info/post/make-macos-install-usb-stick/
为VMware ESXi 安装补丁
Download macOS Unlocker V4.0 for VMware ESXi: https://github.com/DrDonk/esxi-unlocker
The ESXi unlocker will need to be run each time the ESXi Server is upgraded. It is also best to switch ESXi to Maintanence mode and make sure you do not have any VMs running.
cd /tmp; wget http://192.168.18.4:9000/esxi/esxi-unlocker-4.0.6.zip; unzip esxi-unlocker-4.0.6.zip; cd esxi-unlocker-4.0.6; chmod +x unlock; ./unlock

cd /tmp; wget http://192.168.18.4:9000/esxi/esxi-unlocker-4.0.6.zip; unzip esxi-unlocker-4.0.6.zip; cd esxi-unlocker-4.0.6; chmod +x check; ./check
制作镜像
Convert and rename the Disk Image to ISO
hdiutil convert /Users/weishi/macOS-installer/Install_macOS_13.6.9-22G830.dmg -format UDTO -o ~/Downloads/Ventura; mv -v ~/Downloads/Ventura.cdr ~/Downloads/Ventura.iso
VMware中安装 .iso
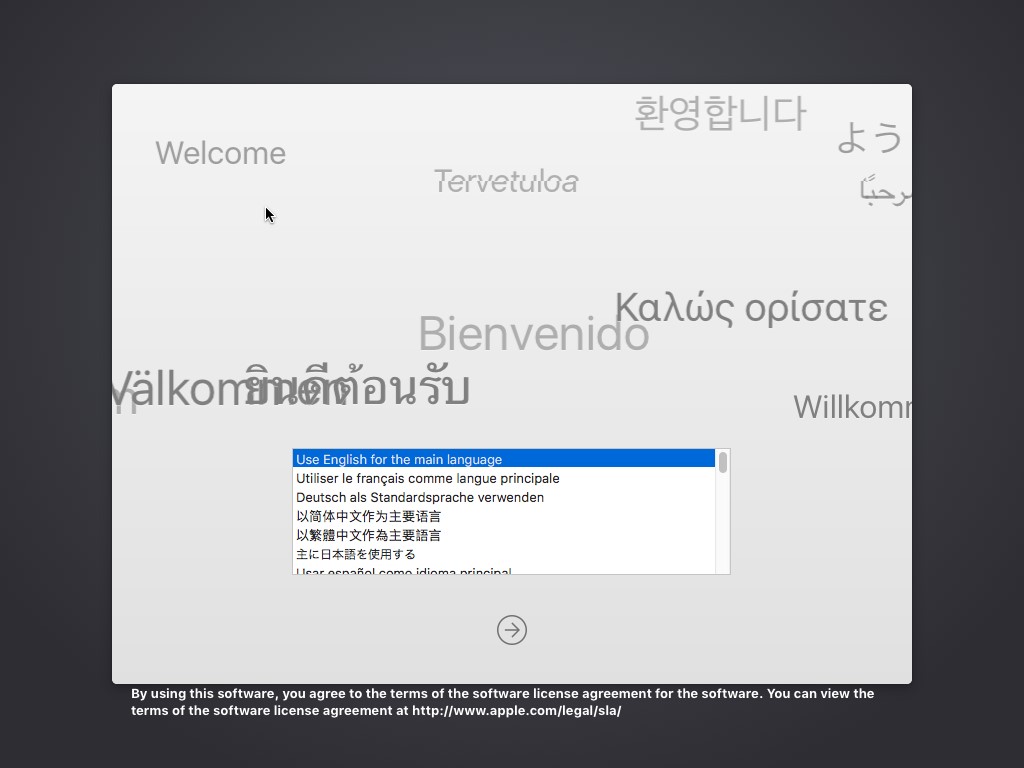
如果你进到了下图所示这里,恭喜你!表明我们自己做的镜像没有问题。
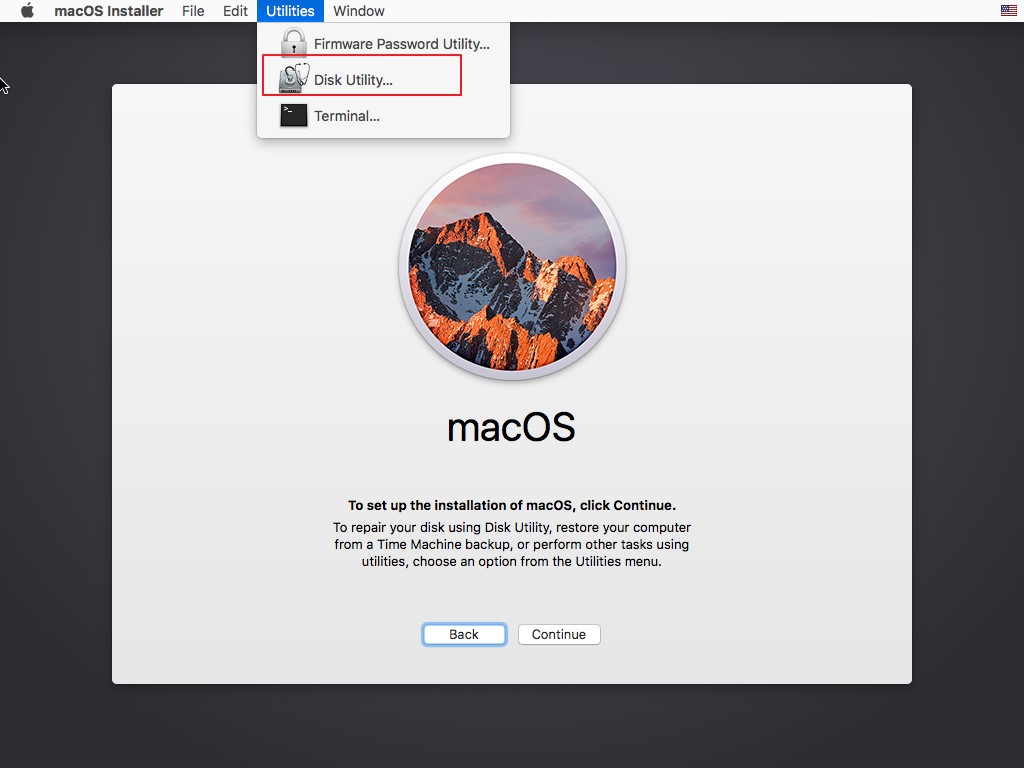
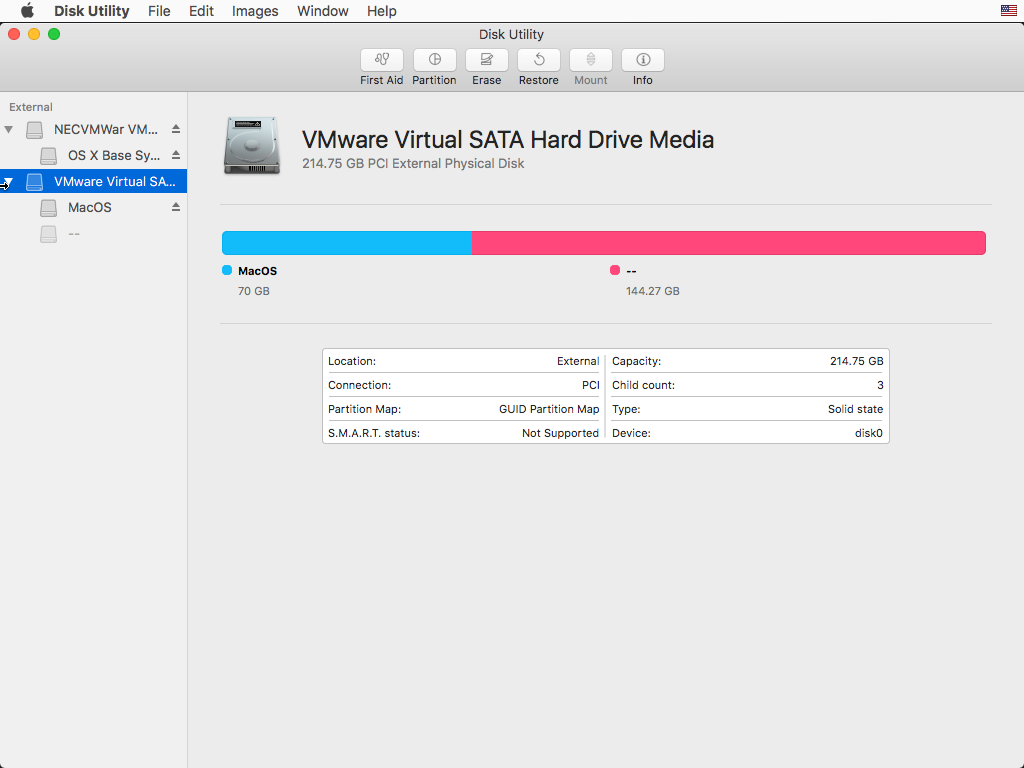
系统分区
选好语言后,我们要给我们的系统分区啦,使用“Disk Utility”这个官方工具,如下图。
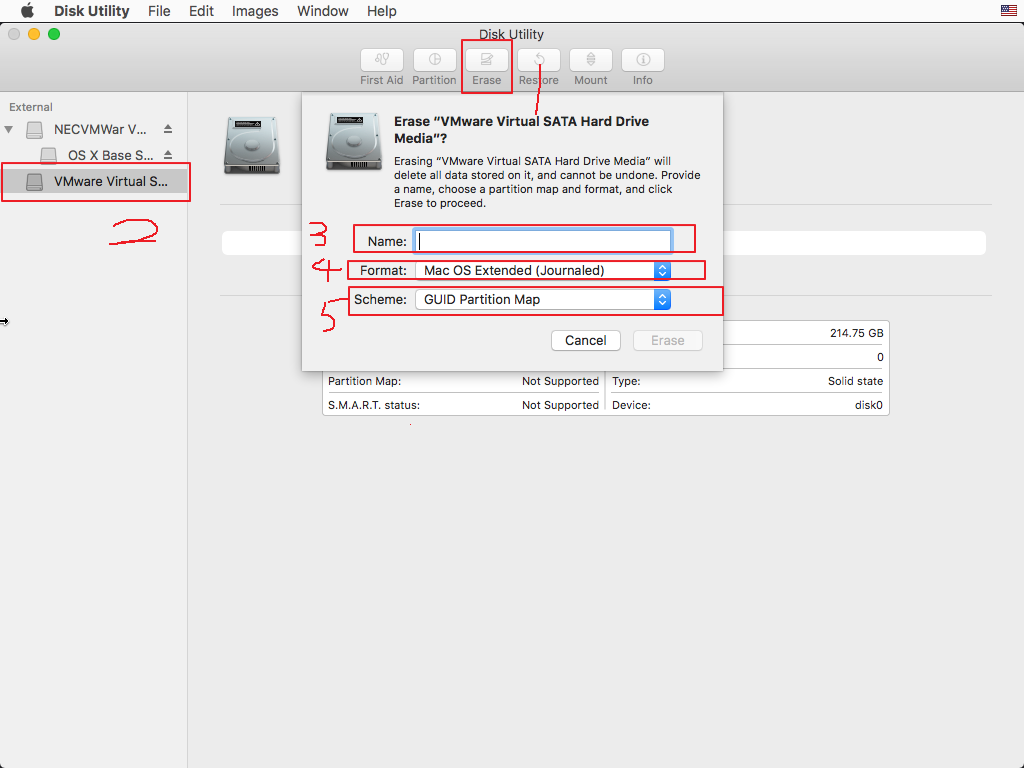
依次点击“Erase”(步骤1),选择我们要操作的分区(步骤2),命名(步骤3),选择磁盘文件系统为Mac OS Extended(Journaled)(步骤4),模式为GUID(步骤5)。
对整个磁盘建立分区(左侧选择物理磁盘后,点击“Partition”)。具体分几个分区,分多大,你们自己决定吧。
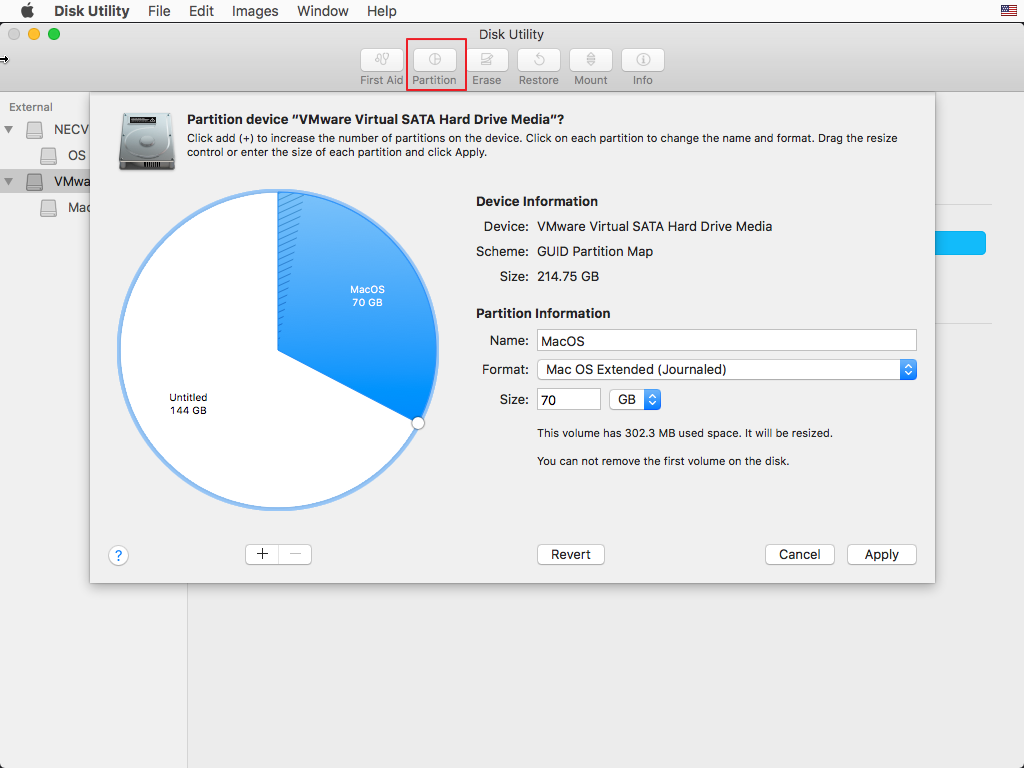
这是我进行分区完之后的结果,之后就可以关闭“Disk Utility”工具,并且开始安装操作系统。
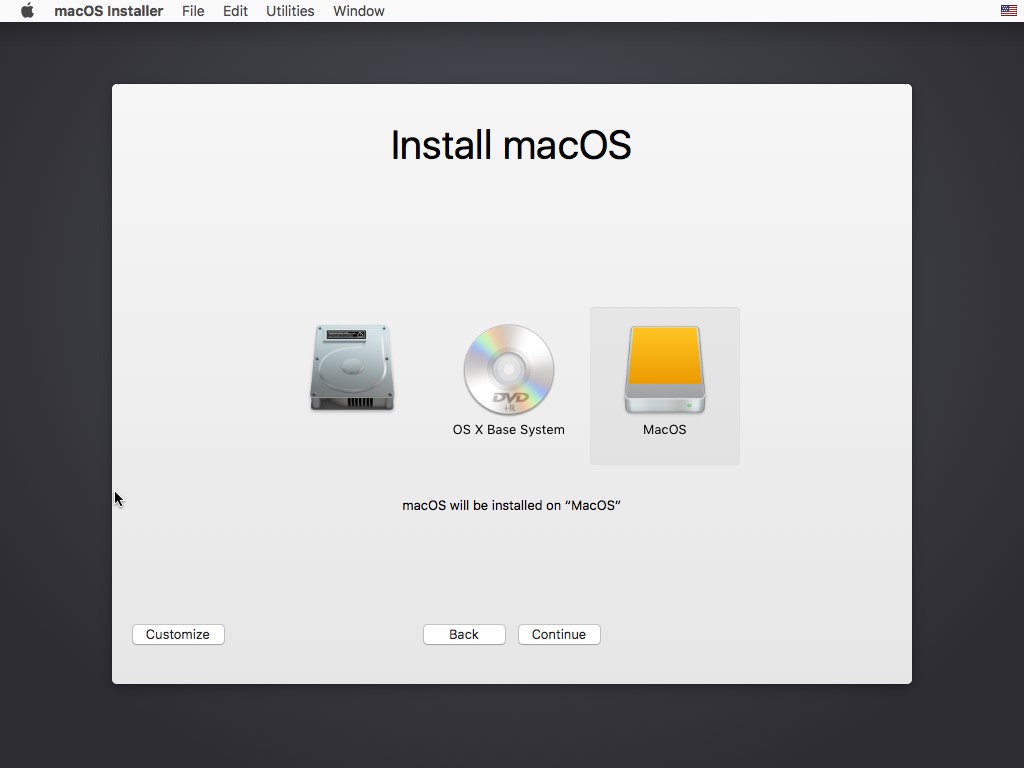
关闭工具后,开始安装操作系统。

安装ing
这里选择你要将操作系统安装到哪个分区里,下一步后,就等待吧。。。。
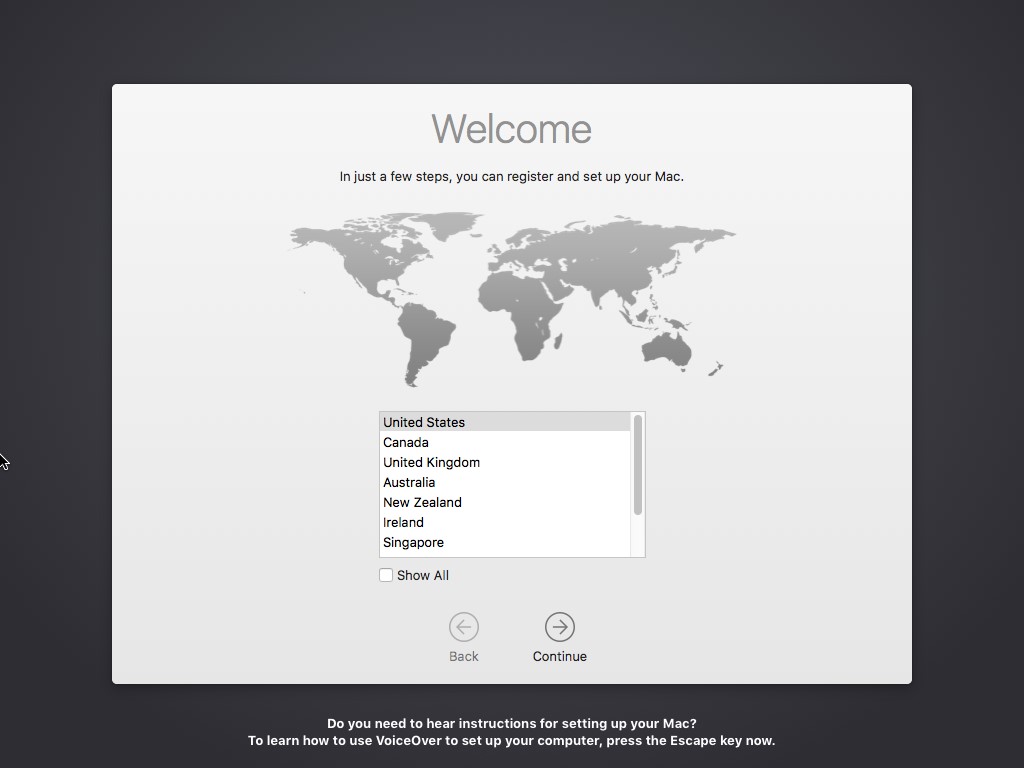
出现这个后,就表示安装完啦,一些简单的设置,自己看着办吧。
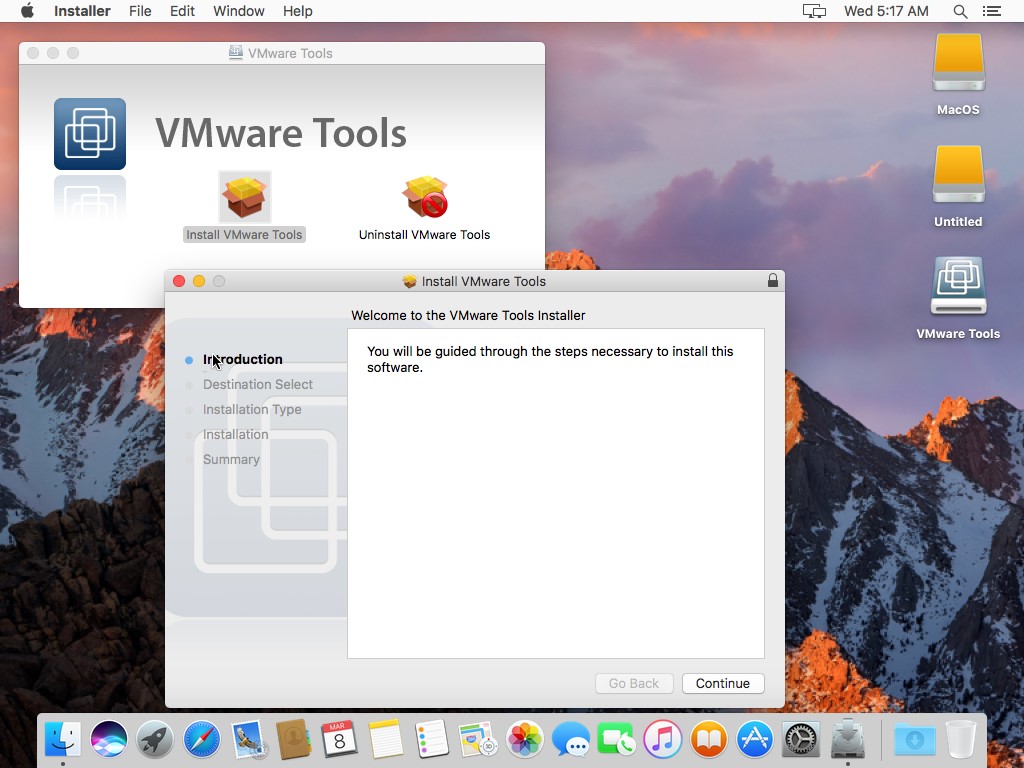
安装VMware Tools
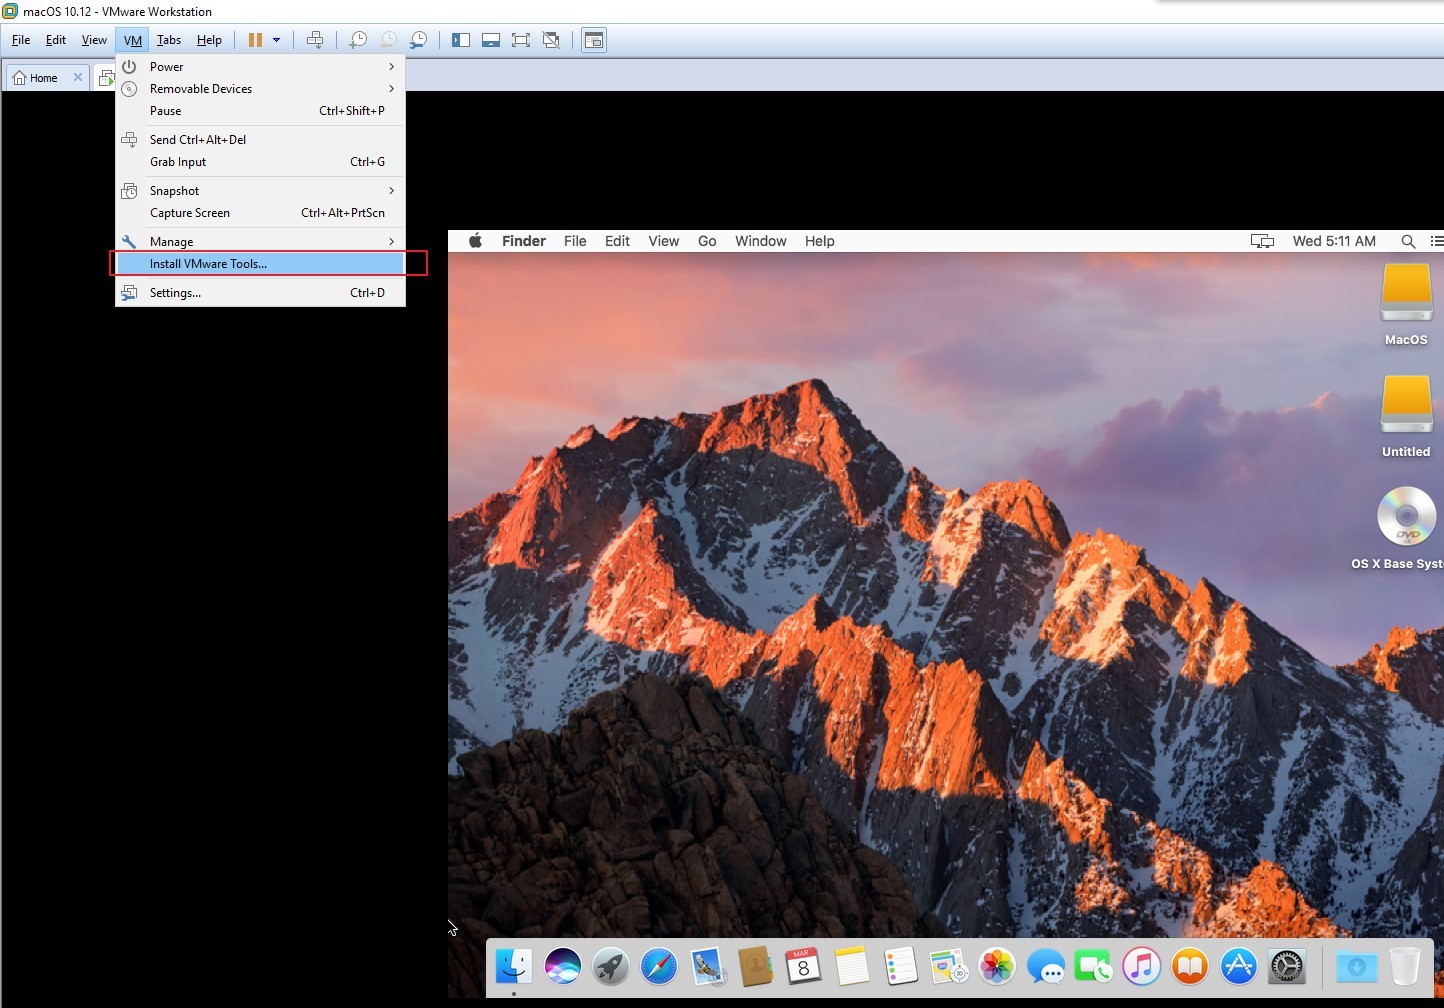
一步一步走,再重启后,就完成啦。
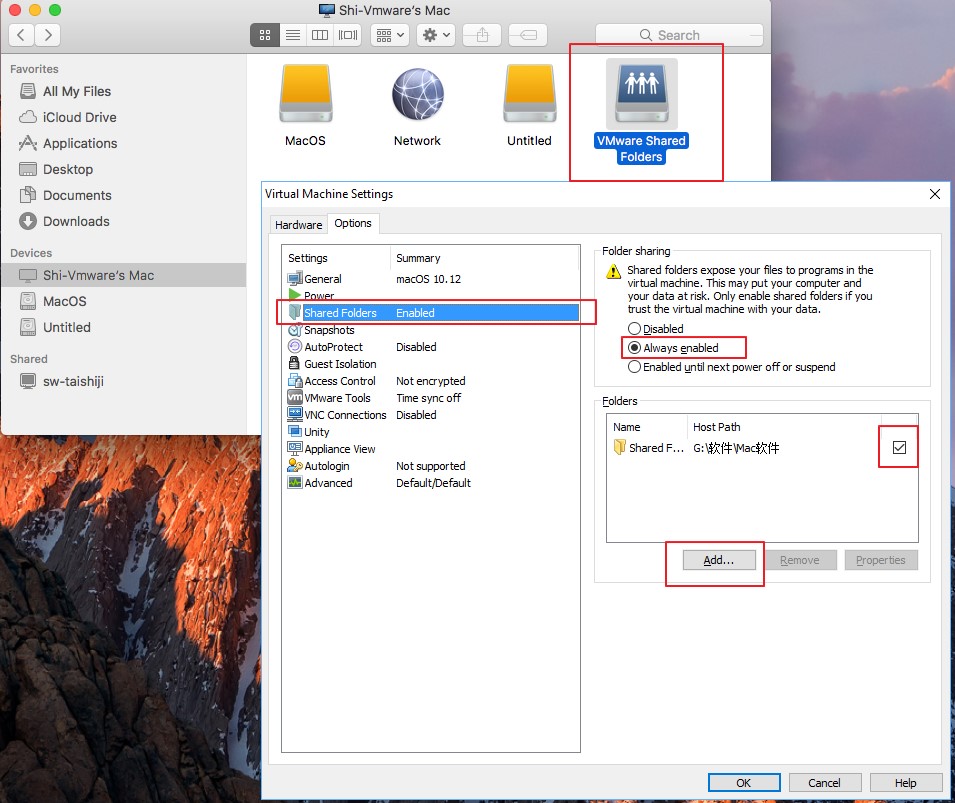
与物理机共享文件夹
在虚拟机设置中,增加一个共享文件夹,这样就可以在虚拟机和主机之间交换文件了
Reference
-
https://www.wikigain.com/install-macos-big-sur-on-vmware-windows-pc/
-
https://www.geekrar.com/how-to-fix-the-cpu-has-been-disabled-by-the-guest-os/
-
https://linustechtips.com/topic/1280630-how-to-install-macos-big-sur-on-vmware-playerworkstation/
-
https://www.dev2qa.com/how-to-fix-no-disk-to-select-issue-when-install-mac-os-on-virtual-machine/