12 Jan 2025 Update: use https://github.com/XiaoMi/ha_xiaomi_home directly as official support
ha_xiaomi_home
ref https://github.com/XiaoMi/ha_xiaomi_home
完成后,点击添加“HomeKit Bridge” 集成,按照指引完成添加。
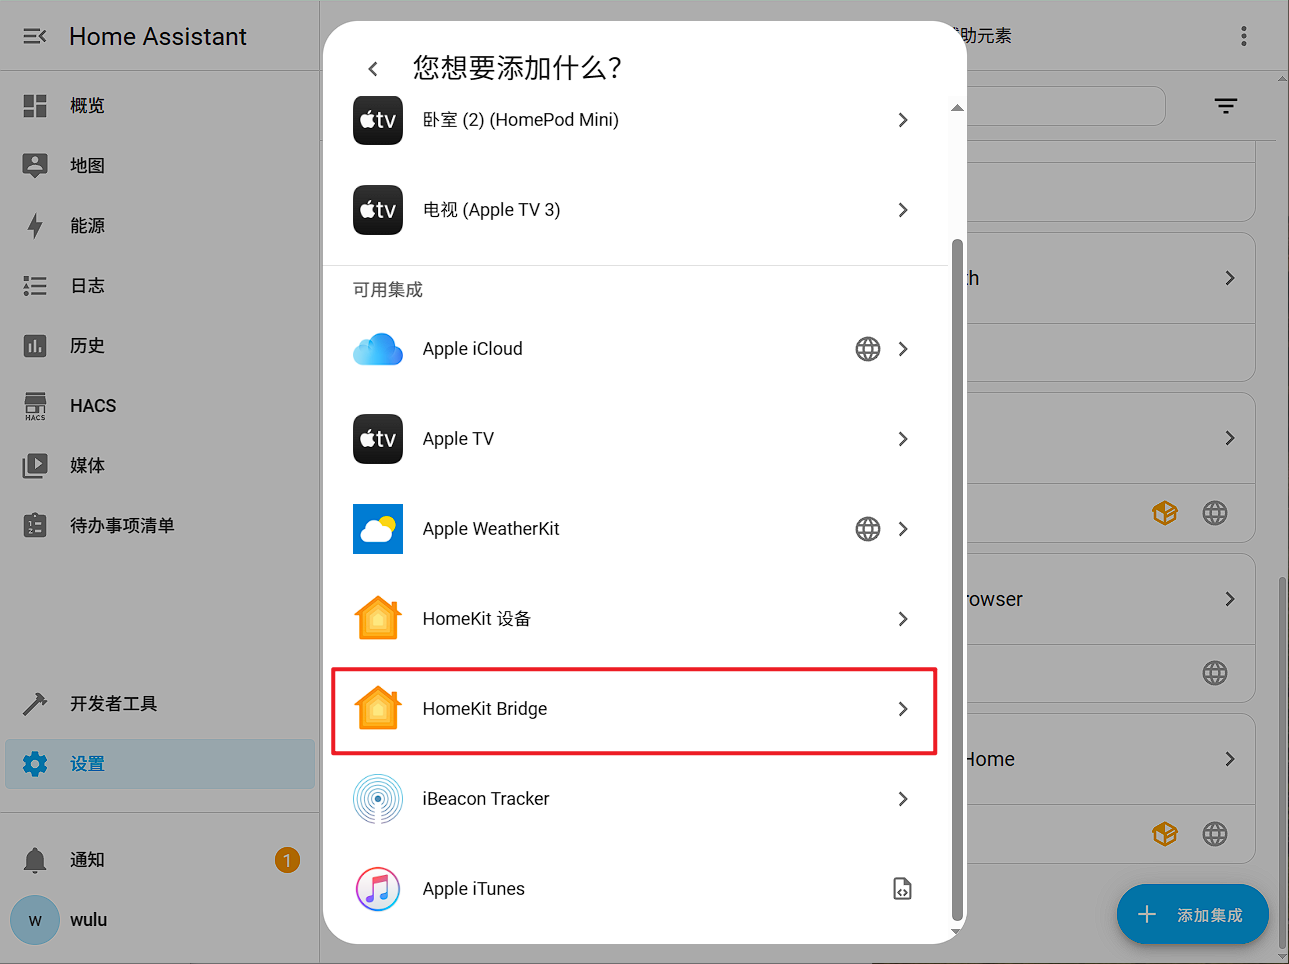
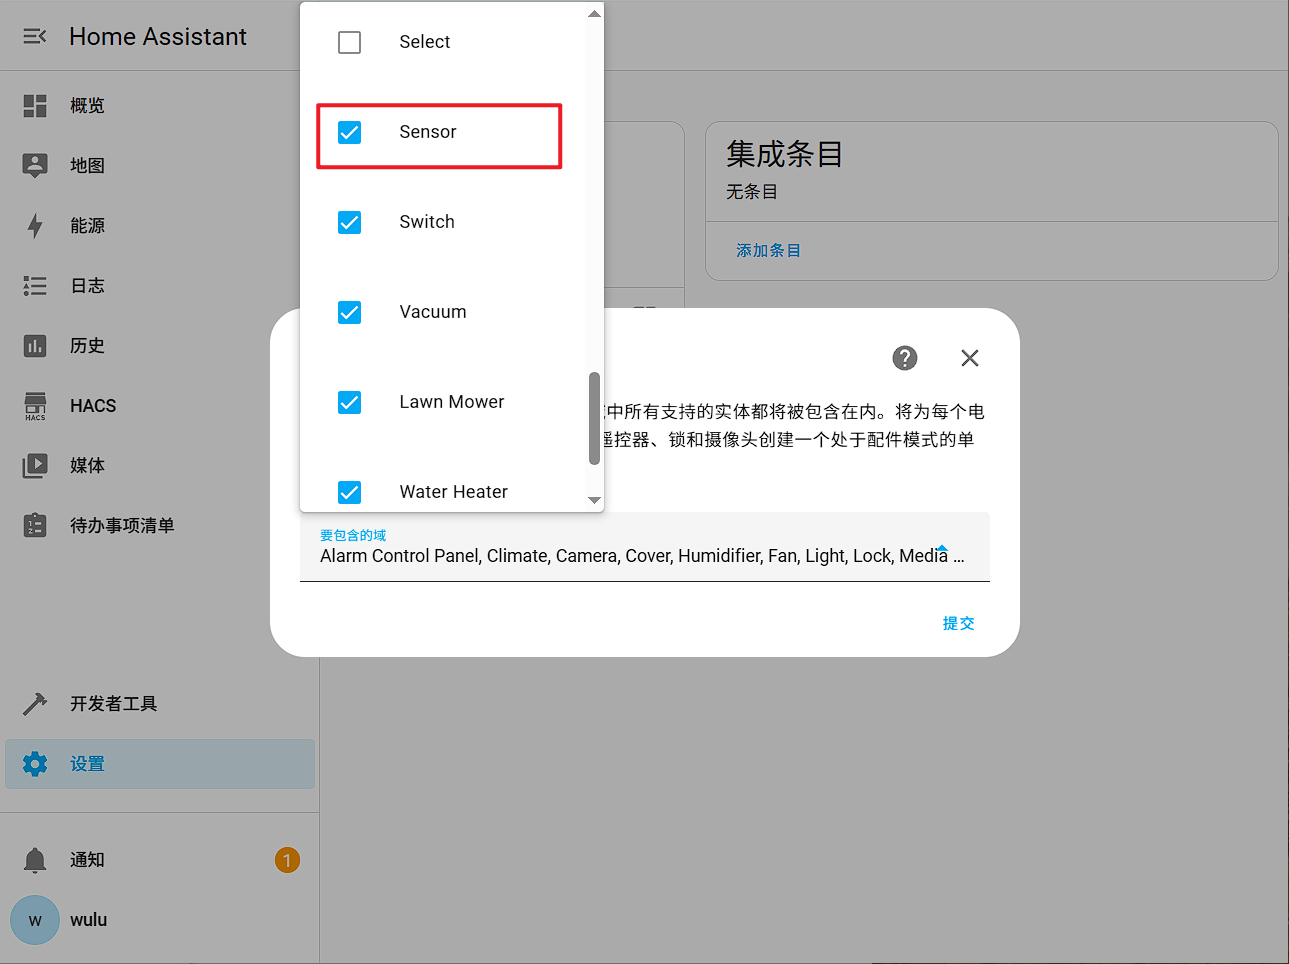
需要注意的是,如果你希望桥接传感器类型的设备(如温湿度传感器),确保在“要包含的域”中勾选“Sensor”选项,这个选项默认是未勾选的。
Useful Tool
python-miio
$ virtualenv mymiio -p python3; cd mymiio/; source bin/activate; pip3 install python-miio

# upgrade python-miio
$ pip3 install python-miio --upgrade   -i https://pypi.python.org/simple

# 探测所有设备
$ mirobo discover --handshake 1

# 连接设备
$ miiocli device --ip 192.168.2.192 --token 8c201e5611a03347ef1f4d30e2dac6f8 info

$ miiocli --help
Usage: miiocli [OPTIONS] COMMAND [ARGS]...

Options:
  -d, --debug
  -o, --output [default|json|json_pretty]
  --version                       Show the version and exit.
  --help                          Show this message and exit.

Commands:
  ...
Reference
小米插头
小米蓝牙插座2 - chuangmi.plug.212a01
 $ curl -LO https://github.com/syssi/xiaomi_raw/archive/refs/heads/master.zip

 # 添加下面config 到 configuration.yaml

sensor:
  - platform: xiaomi_miio_raw
    name: smart_plug
    host: 192.168.31.227
    token: adf4bfd3f922b97049b3acb6aac738a5
    max_properties: 10
    default_properties_getter: get_properties
    default_properties:
      - "{'did': 'power', 'piid': 1, 'siid': 2}"
      - "{'did': 'temperature', 'piid': 6, 'siid': 2}"
      - "{'did': 'indicator_light', 'piid': 1, 'siid': 3}"
      - "{'did': 'on_duration', 'piid': 1, 'siid': 4}"
      - "{'did': 'off_duration', 'piid': 2, 'siid': 4}"
      - "{'did': 'countdown', 'piid': 3, 'siid': 4}"
      - "{'did': 'task_switch', 'piid': 4, 'siid': 4}"
      - "{'did': 'countdown_info', 'piid': 5, 'siid': 4}"
      - "{'did': 'power_consumption', 'piid': 1, 'siid': 5}"
      - "{'did': 'electric_current', 'piid': 2, 'siid': 5}"
      - "{'did': 'voltage', 'piid': 3, 'siid': 5}"
      - "{'did': 'electric_power', 'piid': 6, 'siid': 5}"
  - platform: template
    sensors:
      smart_plug_power:
        unique_id: smart_plug_power
        unit_of_measurement: W
        value_template: "{{ state_attr('sensor.smart_plug', 'electric_power')/100 }}"
        availability_template: "{{ not is_state('sensor.smart_plug', 'unavailable') }}"
        icon_template: "mdi:flash"

switch:
  - platform: template
    switches:
      smart_plug_switch:
        unique_id: smart_plug_switch
        value_template: "{{ state_attr('sensor.smart_plug', 'power') }}"
        availability_template: "{{ not is_state('sensor.smart_plug', 'unavailable') }}"
        turn_on:
          service: xiaomi_miio_raw.sensor_raw_command
          data:
            entity_id: sensor.smart_plug
            method: set_properties
            params:
              - did: power
                siid: 2
                piid: 1
                value: true
        turn_off:
          service: xiaomi_miio_raw.sensor_raw_command
          data:
            entity_id: sensor.smart_plug
            method: set_properties
            params:
              - did: power
                siid: 2
                piid: 1
                value: false
测试token
$ miiocli device --ip 192.168.2.192 --token 8c201e5611a03347ef1f4d30e2dac6f8 info
Model: chuangmi.plug.212a01
Hardware version: esp32
Firmware version: 2.1.0_0024
# 使用 python-miio 测试控制
$ miplug --ip 192.168.2.192 --token 8c201e5611a03347ef1f4d30e2dac6f8 -d

# 使用 python-miio 测试控制
$ miplug --ip 192.168.2.192 --token 8c201e5611a03347ef1f4d30e2dac6f8 on
Reference
- Issue: https://github.com/rytilahti/python-miio/issues/844
- https://github.com/syssi/xiaomiplug
- https://github.com/rytilahti/python-miio/issues/844
小米WIFI插头(Xiaomi Smart WiFi Socket)- chuangmi.plug.m3
You can install this custom component by adding this repository (https://github.com/syssi/xiaomiplug) to HACS in the settings menu of HACS first.
$ cd /home/homeassistant/.homeassistant
$ git clone https://github.com/syssi/xiaomiplug.git
$ mv xiaomiplug/custom_components custom_components
$ rm -rf xiaomiplug
You will find the custom component in the integration menu afterwards, look for ‘Xiaomi Mi … Integration’. Alternatively, you can install it manually by copying the custom_components folder to your Home Assistant configuration folder after git clone git@github.com:syssi/xiaomiplug.git .
Then, get the correpsponding token.
Add into configuration.yaml, as a example:
# Configure a default setup of Home Assistant (frontend, api, etc)
default_config:

# Text to speech
tts:
  - platform: google_translate

group: !include groups.yaml
automation: !include automations.yaml
script: !include scripts.yaml
scene: !include scenes.yaml

switch:
  - platform: xiaomi_miio_plug
    name: Original Xiaomi Mi Smart WiFi Socket
    host: 192.168.2.177
    token: 75816a8a5532015865c314758e5b9a8d
    model: chuangmi.plug.m3
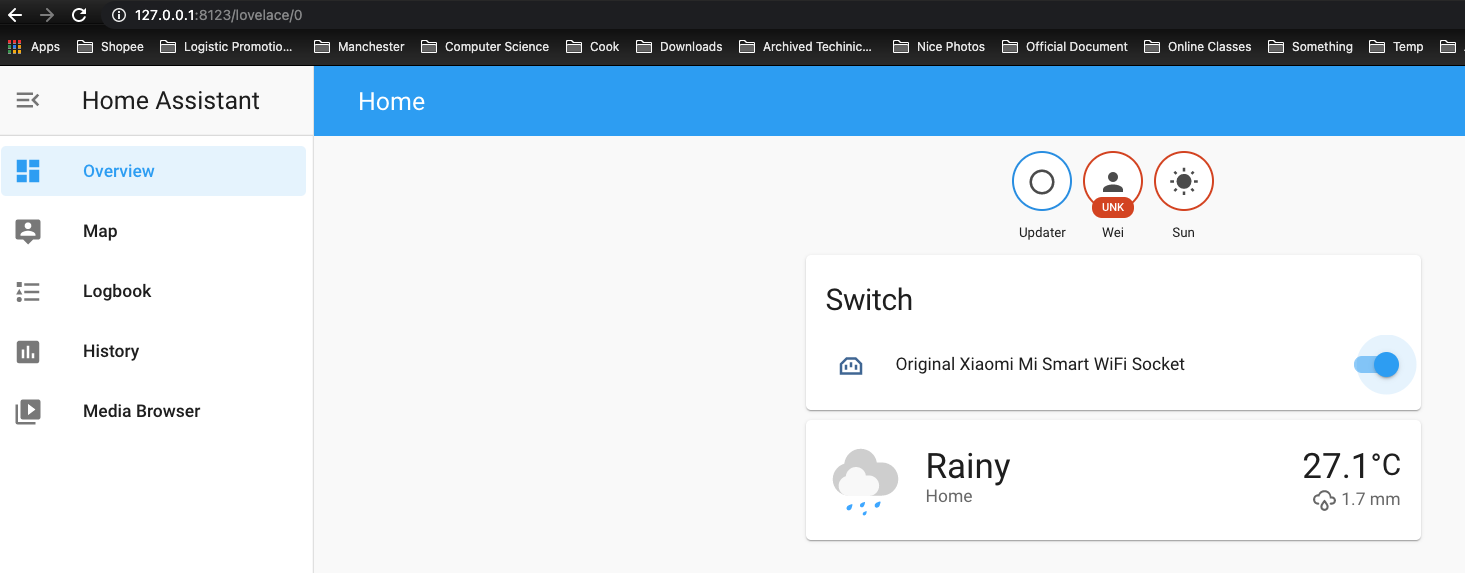
Restart home assistant and then you would be able to see:
$ miiocli device --ip 192.168.2.177 --token 75816a8a5532015865c314758e5b9a8d info

$ miplug --ip 192.168.2.177 --token 75816a8a5532015865c314758e5b9a8d on
Power on: ['ok']
$ miplug --ip 192.168.2.177 --token 75816a8a5532015865c314758e5b9a8d off
Power off: ['ok']

# or
$ miiocli chuangmiplug --ip 192.168.31.32 --token c4b0199e2594c6b3cd3f4ca7dcf9eb23 off
Reference
- https://sumju.net/?p=706
- https://www.youtube.com/watch?v=MdtIqwOF6gk&feature=youtu.be
- https://github.com/syssi/xiaomiplug
小米米家空调伴侣2 - lumi.acpartner.mcn02 (KTBL03LM)
Refer to 【IoT】Home Assistant 集成 Aqara 空调伴侣(KTBL11LM)
米家落地扇
小米米家落地扇 1X - dmaker.fan.p5
Refer to https://github.com/syssi/xiaomi_fan
# If install HA core on OS
$ sudo -u homeassistant -H -s
$ cd /home/homeassistant/.homeassistant

$ git clone https://github.com/syssi/xiaomi_fan.git
$ mv xiaomi_fan/custom_components/* custom_components
$ rm -rf xiaomi_fan
Modify Config file:
# configuration.yaml

fan:
  - platform: xiaomi_miio_fan
    name: Xiaomi Smart Fan
    host: 192.168.18.137
    token: b7c4a758c251955d2c24b1d9e41ce47d
米家除菌加湿器(Mi Smart Antibacterial Humidifier)
$ miiocli device --ip 192.168.18.151 --token 4c14b6ae295011c3a60aeb925c829d65 info
Model: deerma.humidifier.jsqm
Hardware version: esp8266
Firmware version: 2.1.3

$ miiocli airdehumidifier --ip 192.168.18.151 --token 4c14b6ae295011c3a60aeb925c829d65 off

$ miiocli airdehumidifier
Commands:
  info                 Get (and cache) miIO protocol information from the...
  off                  Power off.
  on                   Power on.
  raw_command          Send a raw command to the device.
  set_buzzer           Set buzzer on/off.
  set_child_lock       Set child lock on/off.
  set_fan_speed        Set the fan speed.
  set_led              Turn led on/off.
  set_mode             Set mode.
  set_target_humidity  Set the auto target humidity.
  status               Retrieve properties.
  test_properties      Helper to test device properties.
https://github.com/syssi/xiaomi_airpurifier/issues/216
Xiaomi Mi Air Purifier
   NAME:     米家空气净化器 4
   ID:       ...
   IP:       192.168.18.156
   TOKEN:    ...
   MODEL:    zhimi.airp.mp4
Xiaomi Smart WiFi Speaker
Yeelight lights
添加到HomeKit中
- 在HA中控制不了
- 但是可以直接在HomeKit中控制
- 直接用HomeKit App扫描 Yeelight上的二维码
添加到HA中
Adding Yeelight to your Home Assistant instance can be done via the user interface, by taking the following steps:
- Browse to your Home Assistant instance.
- In the sidebar click on Configuration.
- From the configuration menu select: Integrations.
- In the bottom right, click on the Add Integration button.
- From the list, search and select “Yeelight”.
- Follow the instruction on screen to complete the set up.
After completing, the Yeelight integration will be immediately available for use.
How to re-set Yeelight LightStrips
Unplug the power adapter, press the on/off button and meanwhile plug in the power adapter. Holding the button for 5 more seconds until the strip begin to show red, green, blue in turn. Release the button and the indicator LED will turn yellow, which means reset successfully
Ref
此后,
-
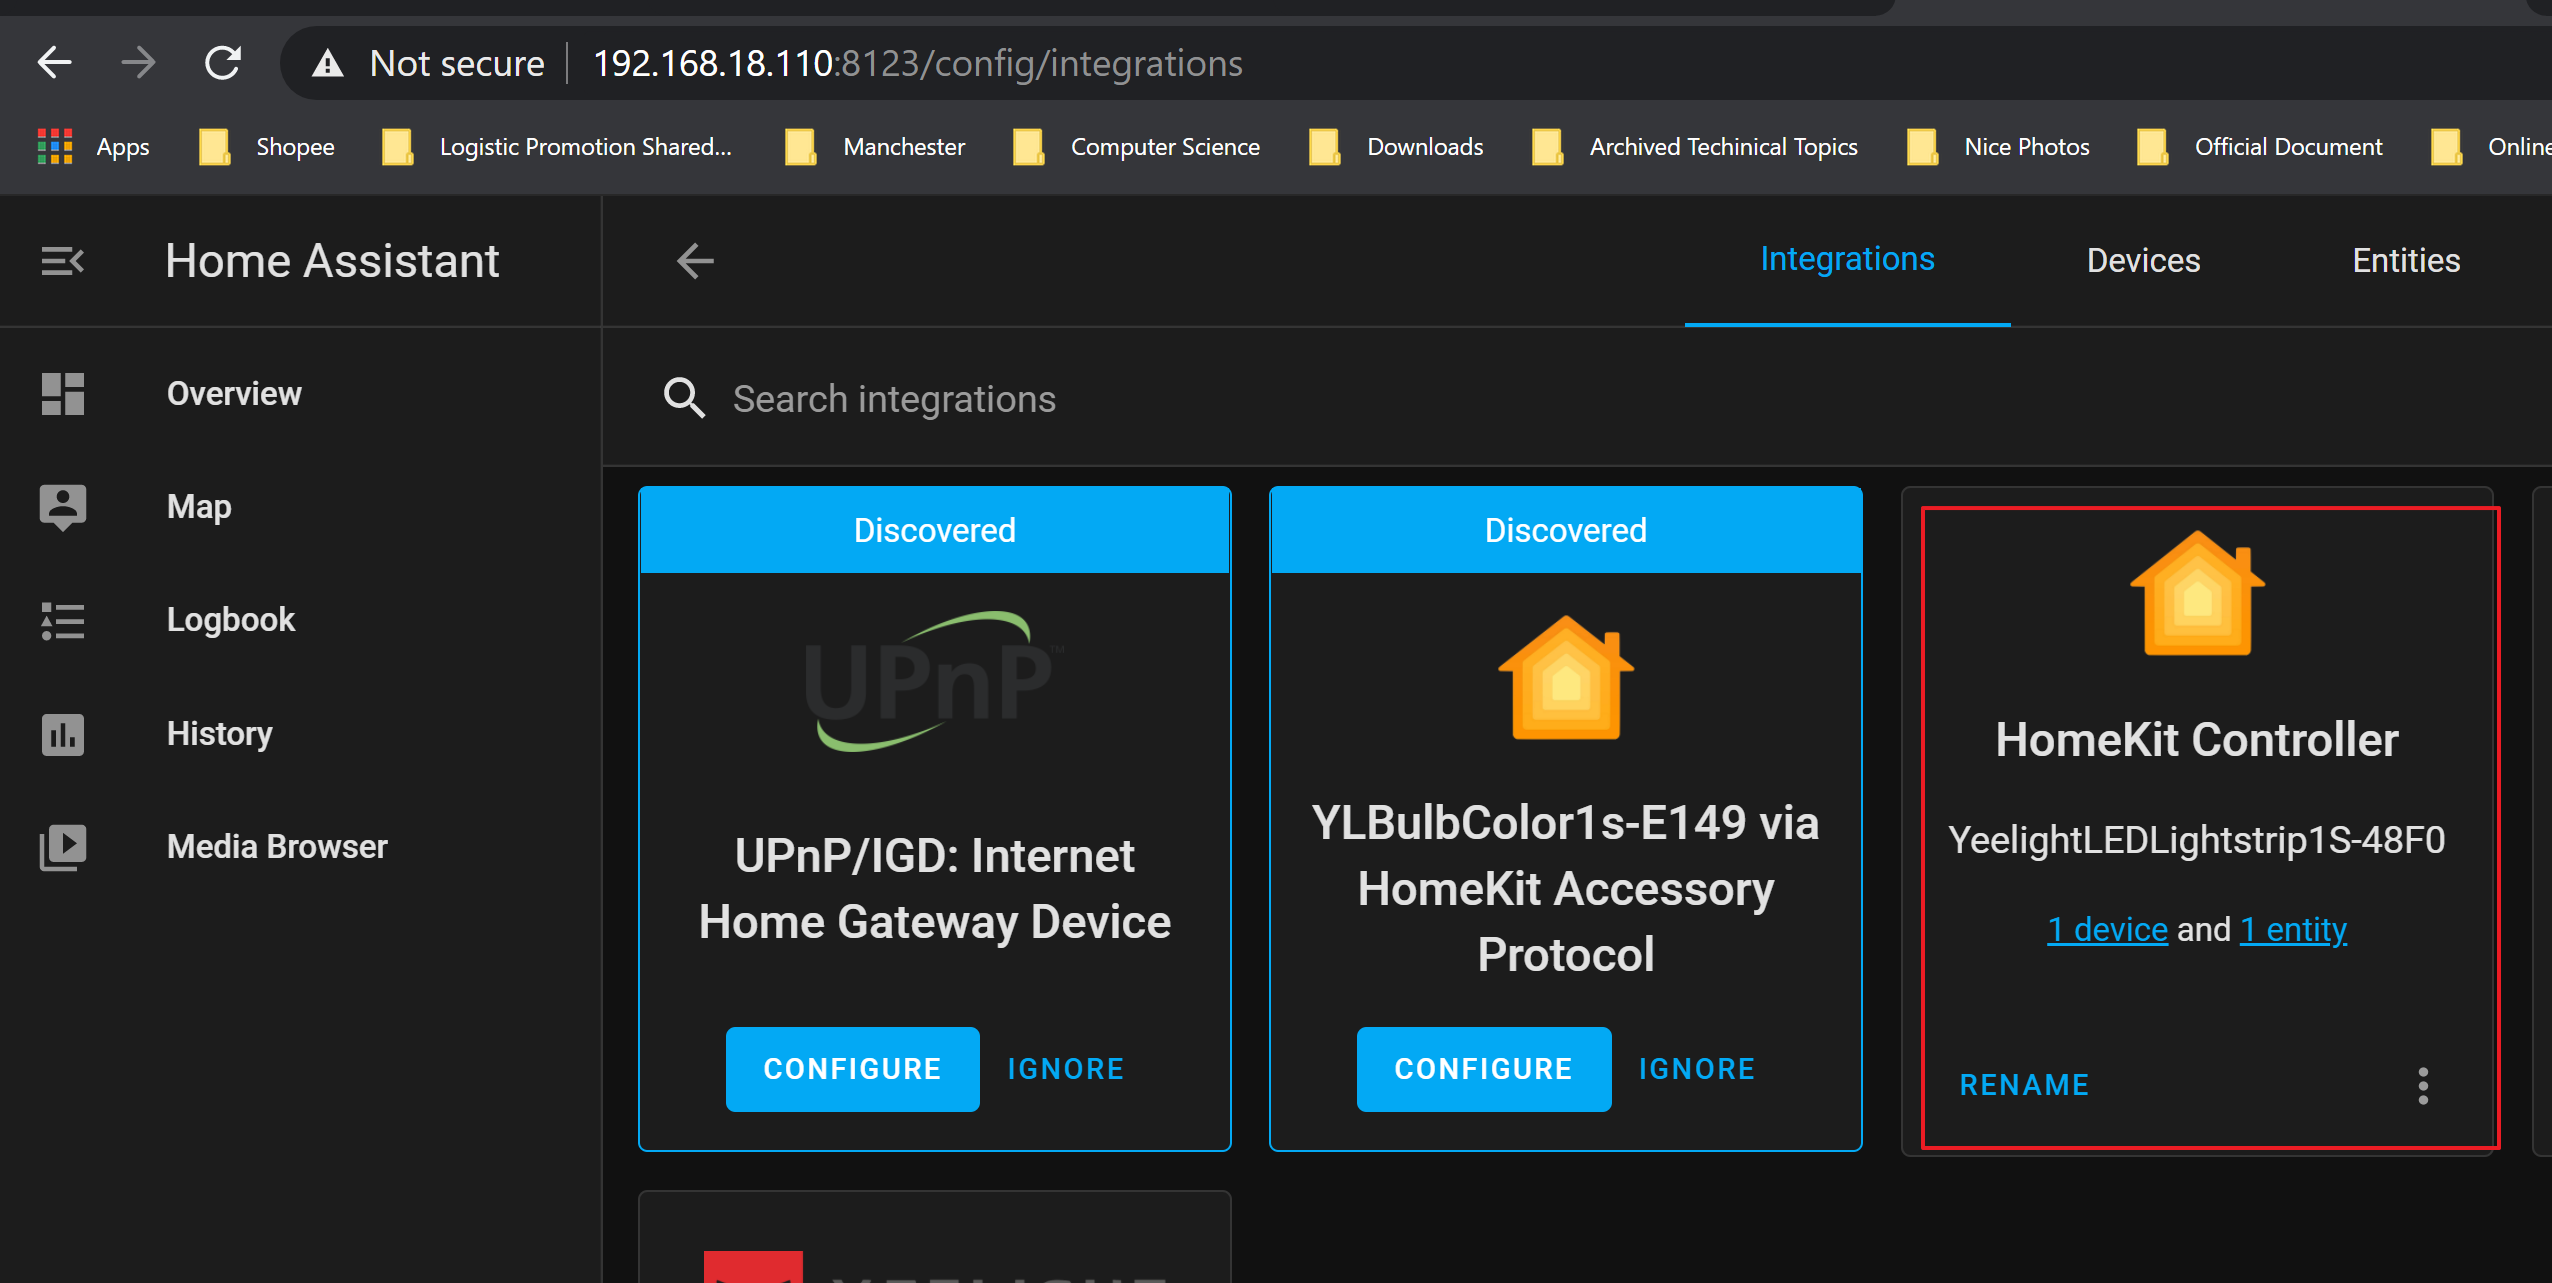
Yeelight 彩色 strip 1S 可以自动被识别
-
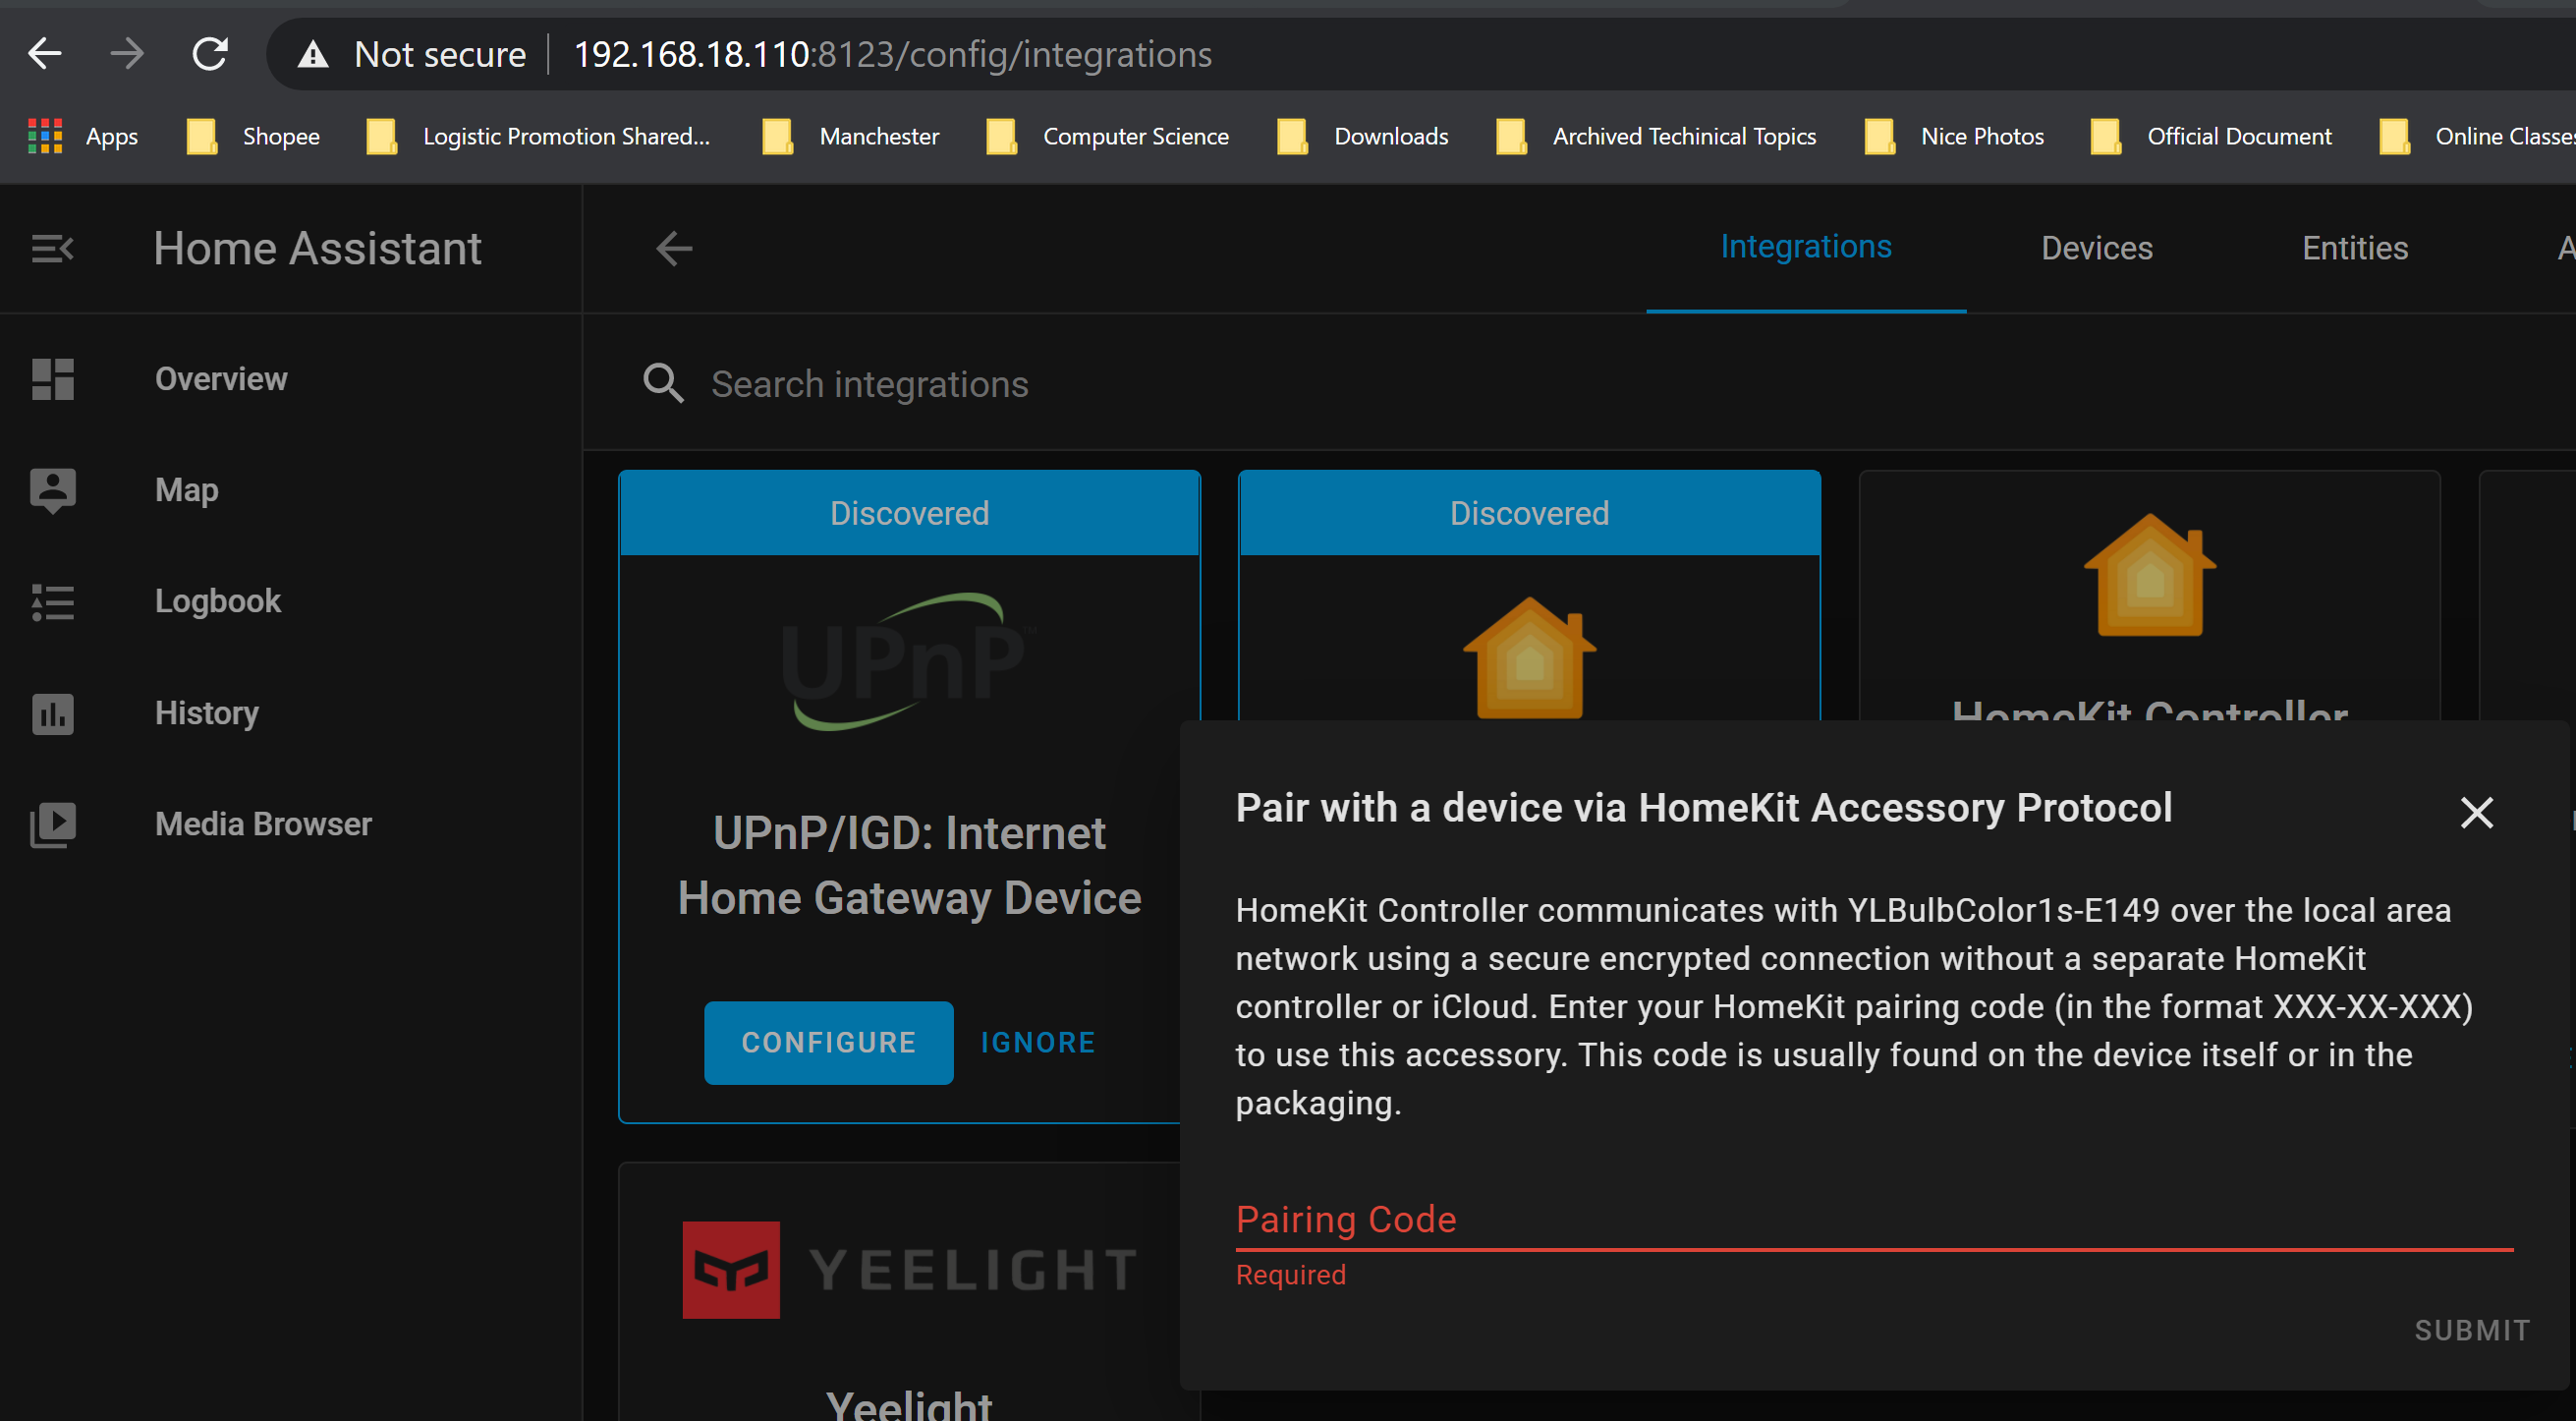
在灯带的连接线上找到一个 8 位数字(即 HomeKit pairing code )
-
在Home Assistant 中输入这个 HomeKit pairing code
-
如果连接成功,则可以在HA里看到如下所示
-
-
yeelight 彩色 bulb 可以自动被识别
-
在灯泡上找到一个 8 位数字(即 HomeKit pairing code)
-
在Home Assistant 中输入这个 HomeKit pairing code
-
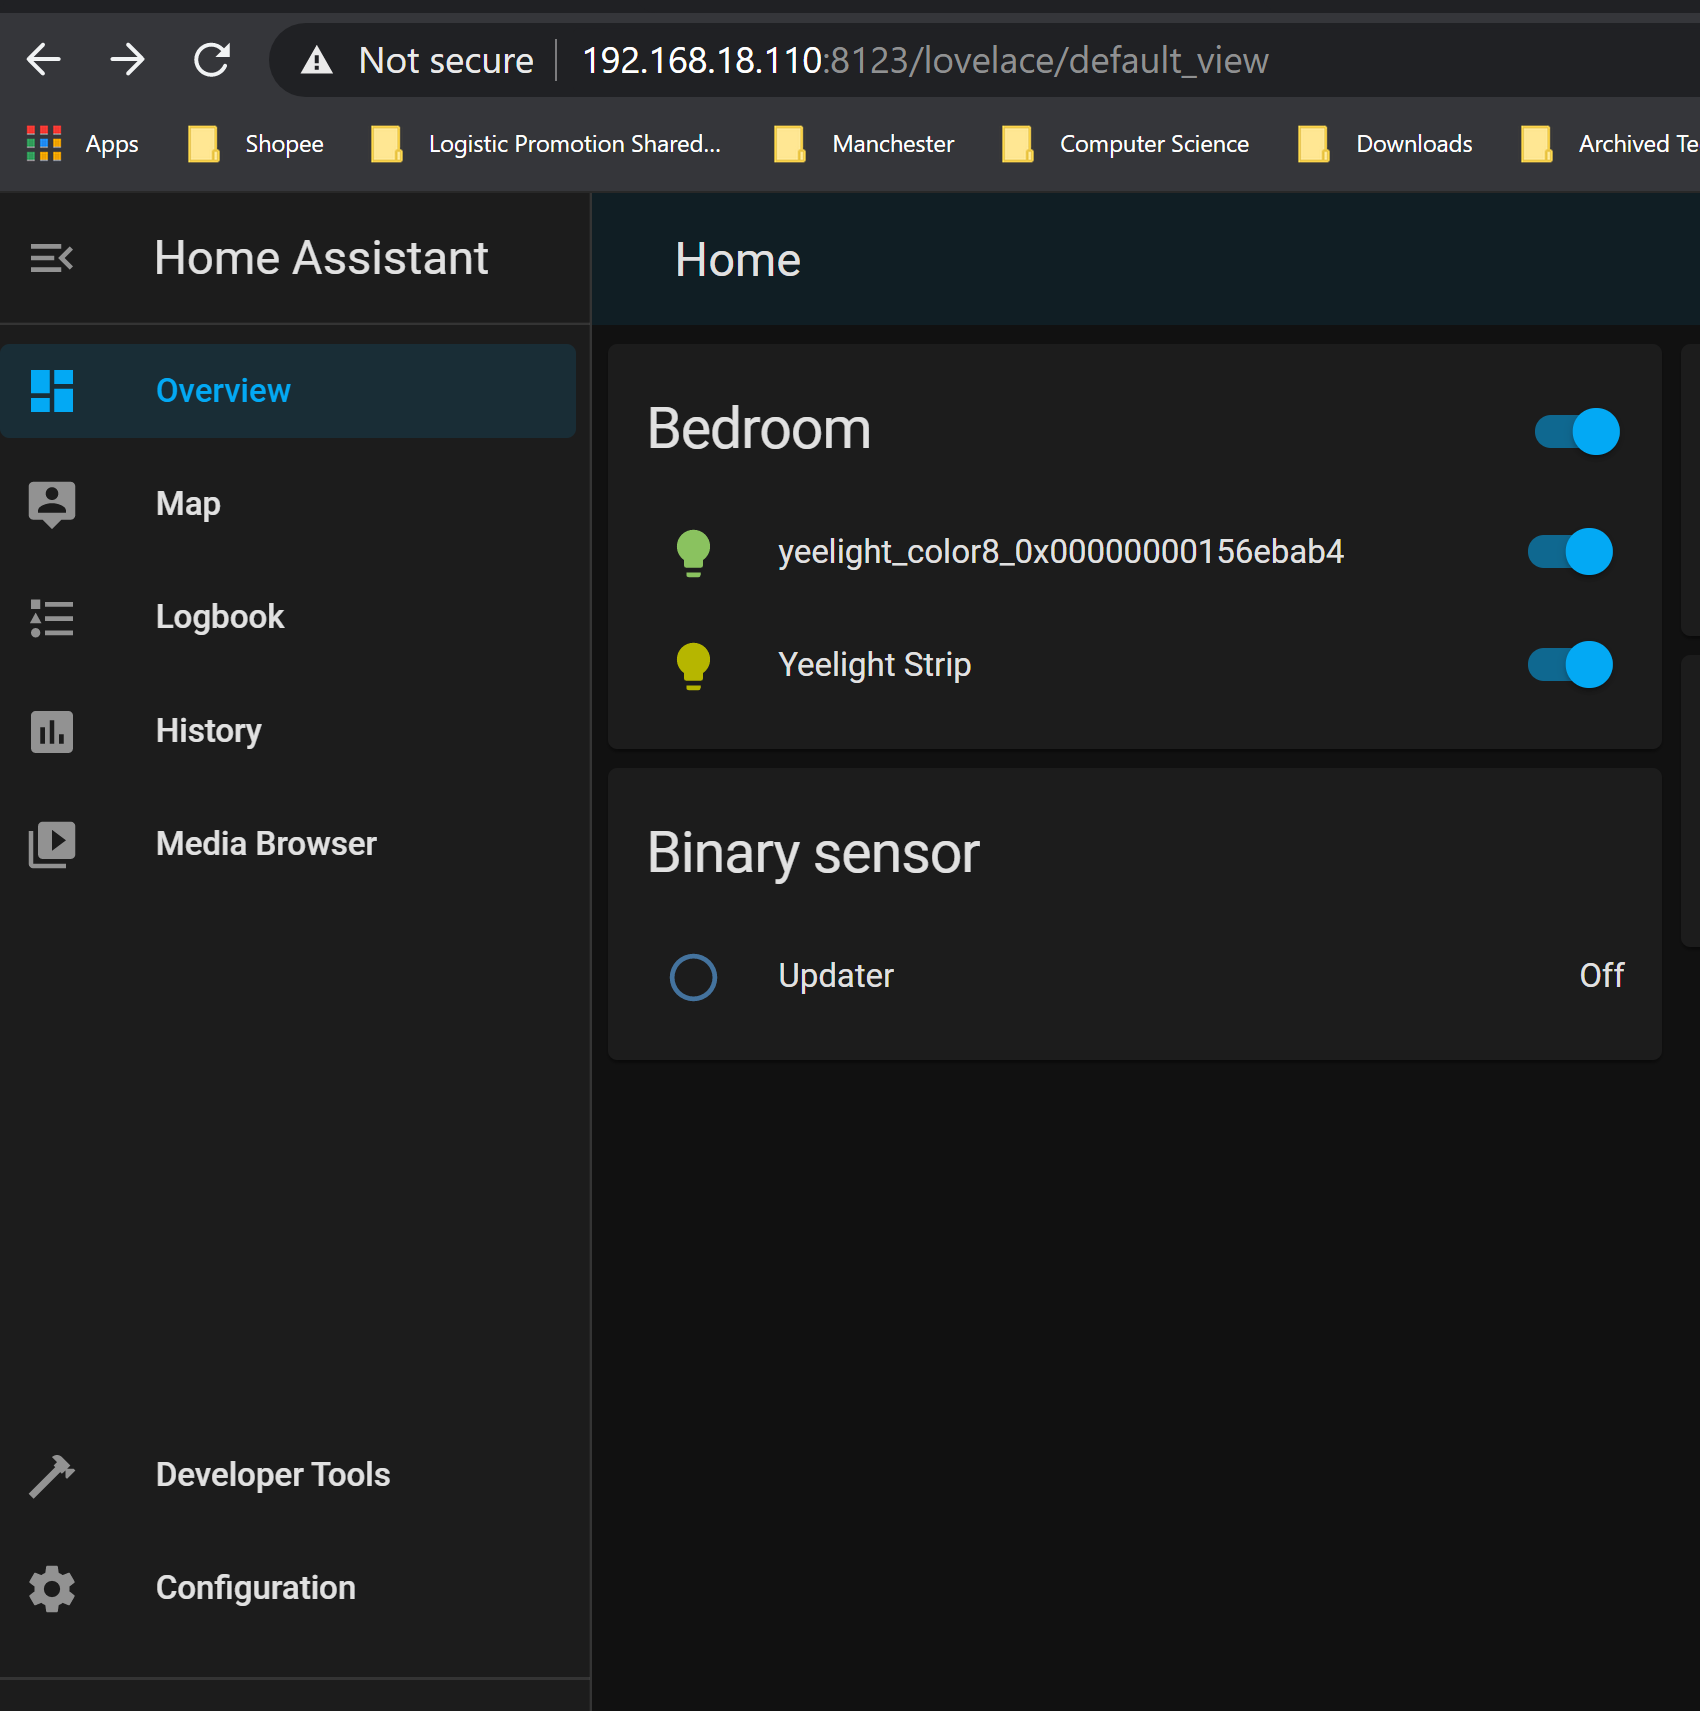
如果连接成功,也会在HA里看到
-
配置成功后,就可以在HA 里控制它们了,包括亮度和颜色:
如果你不需要在 HA 里面操作它们,yeelight 支持直接将其添加到HomeKit中。
-
在iPhone的Home app中,scan yeelight strip 上的 QRcode,以让Home 连接到yeelight
-
如果iPhone 无法连接 HA,可能是防火墙把连接block了
$ sudo iptables -A INPUT -s 192.168.18.0/24 -p tcp -m state --state NEW -m tcp --dport 8123 -j ACCEPT
How to reset
Ref
- https://gitlab.com/stavros/python-yeelight/
- https://www.home-assistant.io/integrations/yeelight/
- https://community.home-assistant.io/t/yeelight-not-recognized-in-home-assistant/141493/20
- https://community.home-assistant.io/t/xiaomi-yeelight-step-by-step/63655/12
Another Approach
Reference
- https://www.home-assistant.io/integrations/xiaomi_miio/#xiaomi-smart-wifi-socket-and-smart-power-strip
- https://github.com/PiotrMachowski/Xiaomi-cloud-tokens-extractor
- https://www.home-assistant.io/integrations/xiaomi_miio/#xiaomi-gateway
- https://github.com/syssi/xiaomiplug
Get access token
- https://python-miio.readthedocs.io/en/latest/discovery.html
- https://github.com/Maxmudjon/com.xiaomi-miio/blob/master/docs/obtain_token.md#:~:text=Open%20your%20copy%20of%20miio2,for%20your%20Mi%20Home%20device.
- https://www.home-assistant.io/integrations/xiaomi_miio/
- https://home-assistant.cc/component/xiaomi/wifi/#%E7%B1%B3%E5%AE%B6-ih-%E7%94%B5%E9%A5%AD%E7%85%B2