Install TrueNAS
https://www.truenas.com/docs/hub/initial-setup/install/firsttimeinstall/#hardware-requirements
https://www.youtube.com/watch?v=iaIezpQsaOE&t=989s
Init OS
- 设置时区:
System-Genral - 设置TrueNAS的名字:
Network-Global Configuration
给 SMB 增加一个 User,因为不能用 root 登录 SMB。
Storage
Pool
- 从
Storage-Pools
Vdev
一个 Pool 由多个 Vdev 组成,每个Vdev有不同的类型(每个Vdev由一个或多个disk组成)。
ARC (Adaptive Replacement Cache): which is uses the server memory (RAM)
Data VDevs:提供存储空间
- 每个
Data VDevs可以选择不同的数据组成方式 - 每个
Data VDevs都是一个阵列,来给 Pool 提供存储空间 - 组成阵列的方式
- Stripe
- Mirror:每一个disk都存储同样的数据
- Raid-z:相当于 RAID 5,允许一个 disk 损坏(当一个 disk 损坏的时候,整个阵列仍然工作)
- Raid-z2:相当于 RAID 6,允许两个 disk 损坏(当一个 disk损坏的时候,可以直接替换这个 disk,整个阵列仍然正常工作)
- 损失2个硬盘的空间,在6个以上的硬盘时使用
Cache VDevs - L2ARC read cache
ZFS L2ARC (second level adaptive replacement cache) read-cache that can be used with fast devices to accelerate read operations. Optional vdev that can be removed
- L2ARC作为一个 read cache,保存从内存读取出来的数据
- L2ARC一个read cache,因此增加L2ARC的大小并不能加速write operation
- 推荐 64GB 以上的 memory,才使用
Cache VDevs,因为Cache VDevs需要占用额外的 memory(L2ARC越大,L2ARC所占用的ARC就越大)- for every data block in the L2ARC, the primary ARC needs an 88 byte entry
- For example, a 480GB L2ARC filled with 4KiB blocks will need more than 10GiB of metadata storage in the primary ARC!
- 而且,
Cache VDevs的容量不应该超过 memory 的 5倍,因为Cache VDevs需要占用额外的 memory,因此使用过大的Cache VDevs会导致 memory 的使用效率降低
- for every data block in the L2ARC, the primary ARC needs an 88 byte entry
Ref https://www.truenas.com/docs/references/l2arc/
Log VDevs
ZFS LOG device that can improve speeds of synchronous writes. Optional write-cache that can be removed - 记录写入文件的名字
Hot Spare
Drive reserved for inserting into DATA pool vdevs when an active drive has failed.
`Metadata
Special Allocation class, used to create Fusion pools. Optional vdev type which is used to speed up metadata and small block IO.
Dedup
De-duplication tables are stored on this special vdev type. These vdevs must be sized to X GiB for each X TiB of general storage.
每一个Pool 都会位于 /mnt 下面:
$ ll
total 6
drwxr-xr-x   3 root  wheel  uarch 128 Mar  2 10:25 ./
drwxr-xr-x  20 root  wheel  uarch  27 Mar  2 09:42 ../
-rw-r--r--   1 root  wheel  uarch   5 Mar  2 00:14 md_size
drwxr-xr-x   2 root  wheel  uarch   2 Mar  2 10:25 SWPool/
Vdev Layout
Ref
Datasets
- 为每个Pool都创建一个Dataset
Understand the difference between a dataset and a zvol.
- A dataset is a self-contained ZFS container for data, and is the smallest unit of control for ZFS policies like compression, deduplication, and quotas. This is also the smallest structure for setting ZFS flags. A dataset is essentially its own independent ZFS filesystem.
- A zvol is a virtual disk image. These are similar to other virtual disks, like vmWare’s VMDK or Hyper-V’s VHD. Unlike these other disk images, a zvol is NOT a file, but is a reference to a block device. (These are actually created in /dev/zvol/tank/, but appear under pool tank in Storage->Pools.)
- Datasets can be nested. A dataset can contain a zvol or another dataset, but a zvol cannot contain any child datasets or zvols.
Ref
- https://www.truenas.com/community/threads/path-to-success-for-structuring-datasets-in-your-pool.85460/
- https://www.truenas.com/docs/core/gettingstarted/storingdata/
Creating a Dataset
To create a dataset in the desired pool, go to Storage > Pools.

Find the pool and top-level (root) dataset for that pool, then click and Add Dataset.

To quickly create a dataset with the default options, enter a name for the dataset and click SUBMIT.
Sync:- Standard uses the sync settings that have been requested by the client software,
- Always waits for data writes (into disk) to complete
- Disabled never waits for writes (into disk) to complete, instead once finish writing into cache, treat it as complete, which means this approach may lose data (e.g., if an outage of eletricity) and thus relatively not safe
Compression levellz4: balance between performance and compression
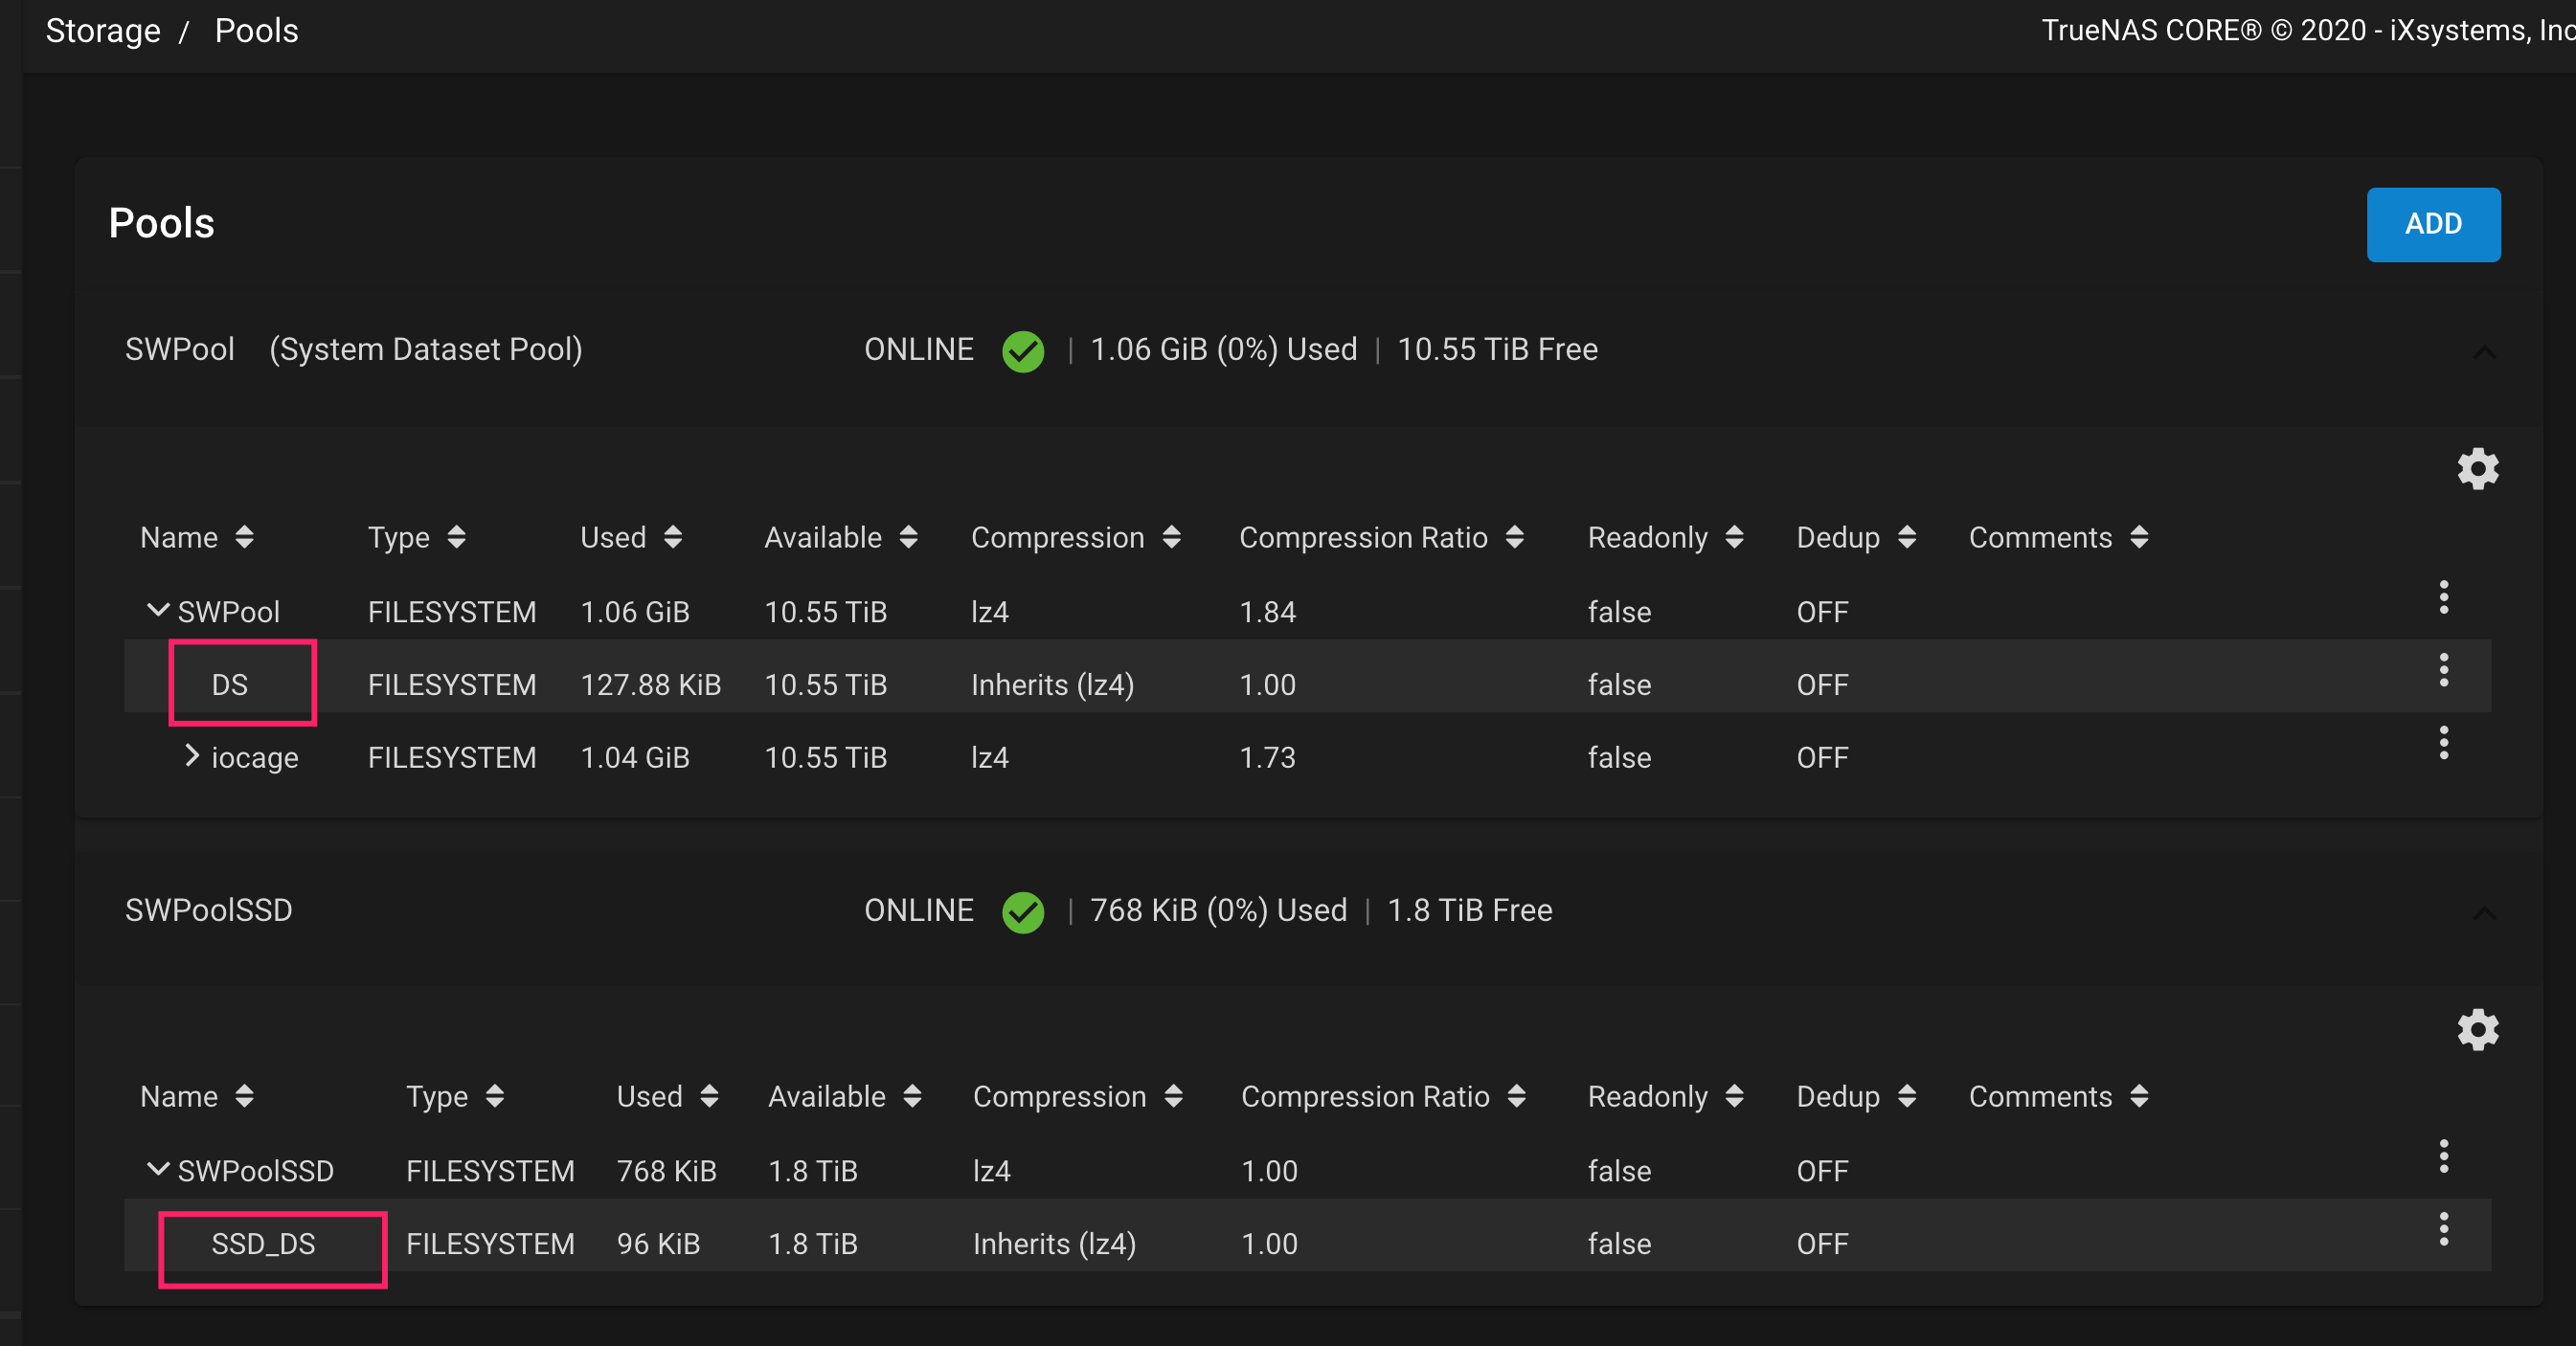
root@SWtruenas[/mnt/SWPool]# pwd
/mnt/SWPool
root@SWtruenas[/mnt/SWPool]# ll
total 1
drwxr-xr-x  3 root  wheel  uarch   3 Mar  2 10:30 ./
drwxr-xr-x  3 root  wheel  uarch 128 Mar  2 10:25 ../
drwxr-xr-x  2 root  wheel  uarch   2 Mar  2 10:30 DS/
Ref
- https://www.truenas.com/docs/core/storage/pools/datasets/
- https://www.youtube.com/watch?v=rFbz-kx_q0w&t=334s
ZVols
Create a Snapshot of a ZVol
- Create Snapshot takes a single current point in time image of the zvol and saves it to Storage > Snapshots. A snapshot Name is suggested and an extra option to make the snapshot Recursive is available.
- Or by
zfs snapshot pool1/zvol@tobecloned
Ref
Clone a ZVol
$ zfs snapshot pool1/zvol@<snapshot_name>
$ zfs send pool1/zvol@<snapshot_name> | zfs recv pool2/<new_zvol_name>

# Cannot use zfs clone, otherwise the following error since cannot create a clone of a file system in a pool that is different from where the original file system snapshot resides.
$ zfs clone SWPool/SWUbuntu2-agoe0o@manual-2021-08-22_11-37 SSDPool2/VM/test
cannot create 'SSDPool2/VM/test': source and target pools differ
When the selected zvol is cloned from an existing snapshot, Promote Dataset is available. When a clone is promoted, the original volume becomes a clone of the clone, making it possible to delete the volume that the clone was created from. Otherwise, a clone cannot be deleted while the original volume exists.
After such a clone, deleteing pool1/zvol won’t let me lose any data, you pool2/<new_zvol_name> is a clone of that data and thus just simply use pool2/<new_zvol_name>.
Ref
- https://www.truenas.com/community/threads/zvol-cloning.61350/
- https://www.reddit.com/r/zfs/comments/ikt47n/best_way_to_clone_zfs_snapshot_to_zvol_on_new_pool/
- https://docs.oracle.com/cd/E19253-01/819-5461/gaypf/index.html
Permission
Use ACL
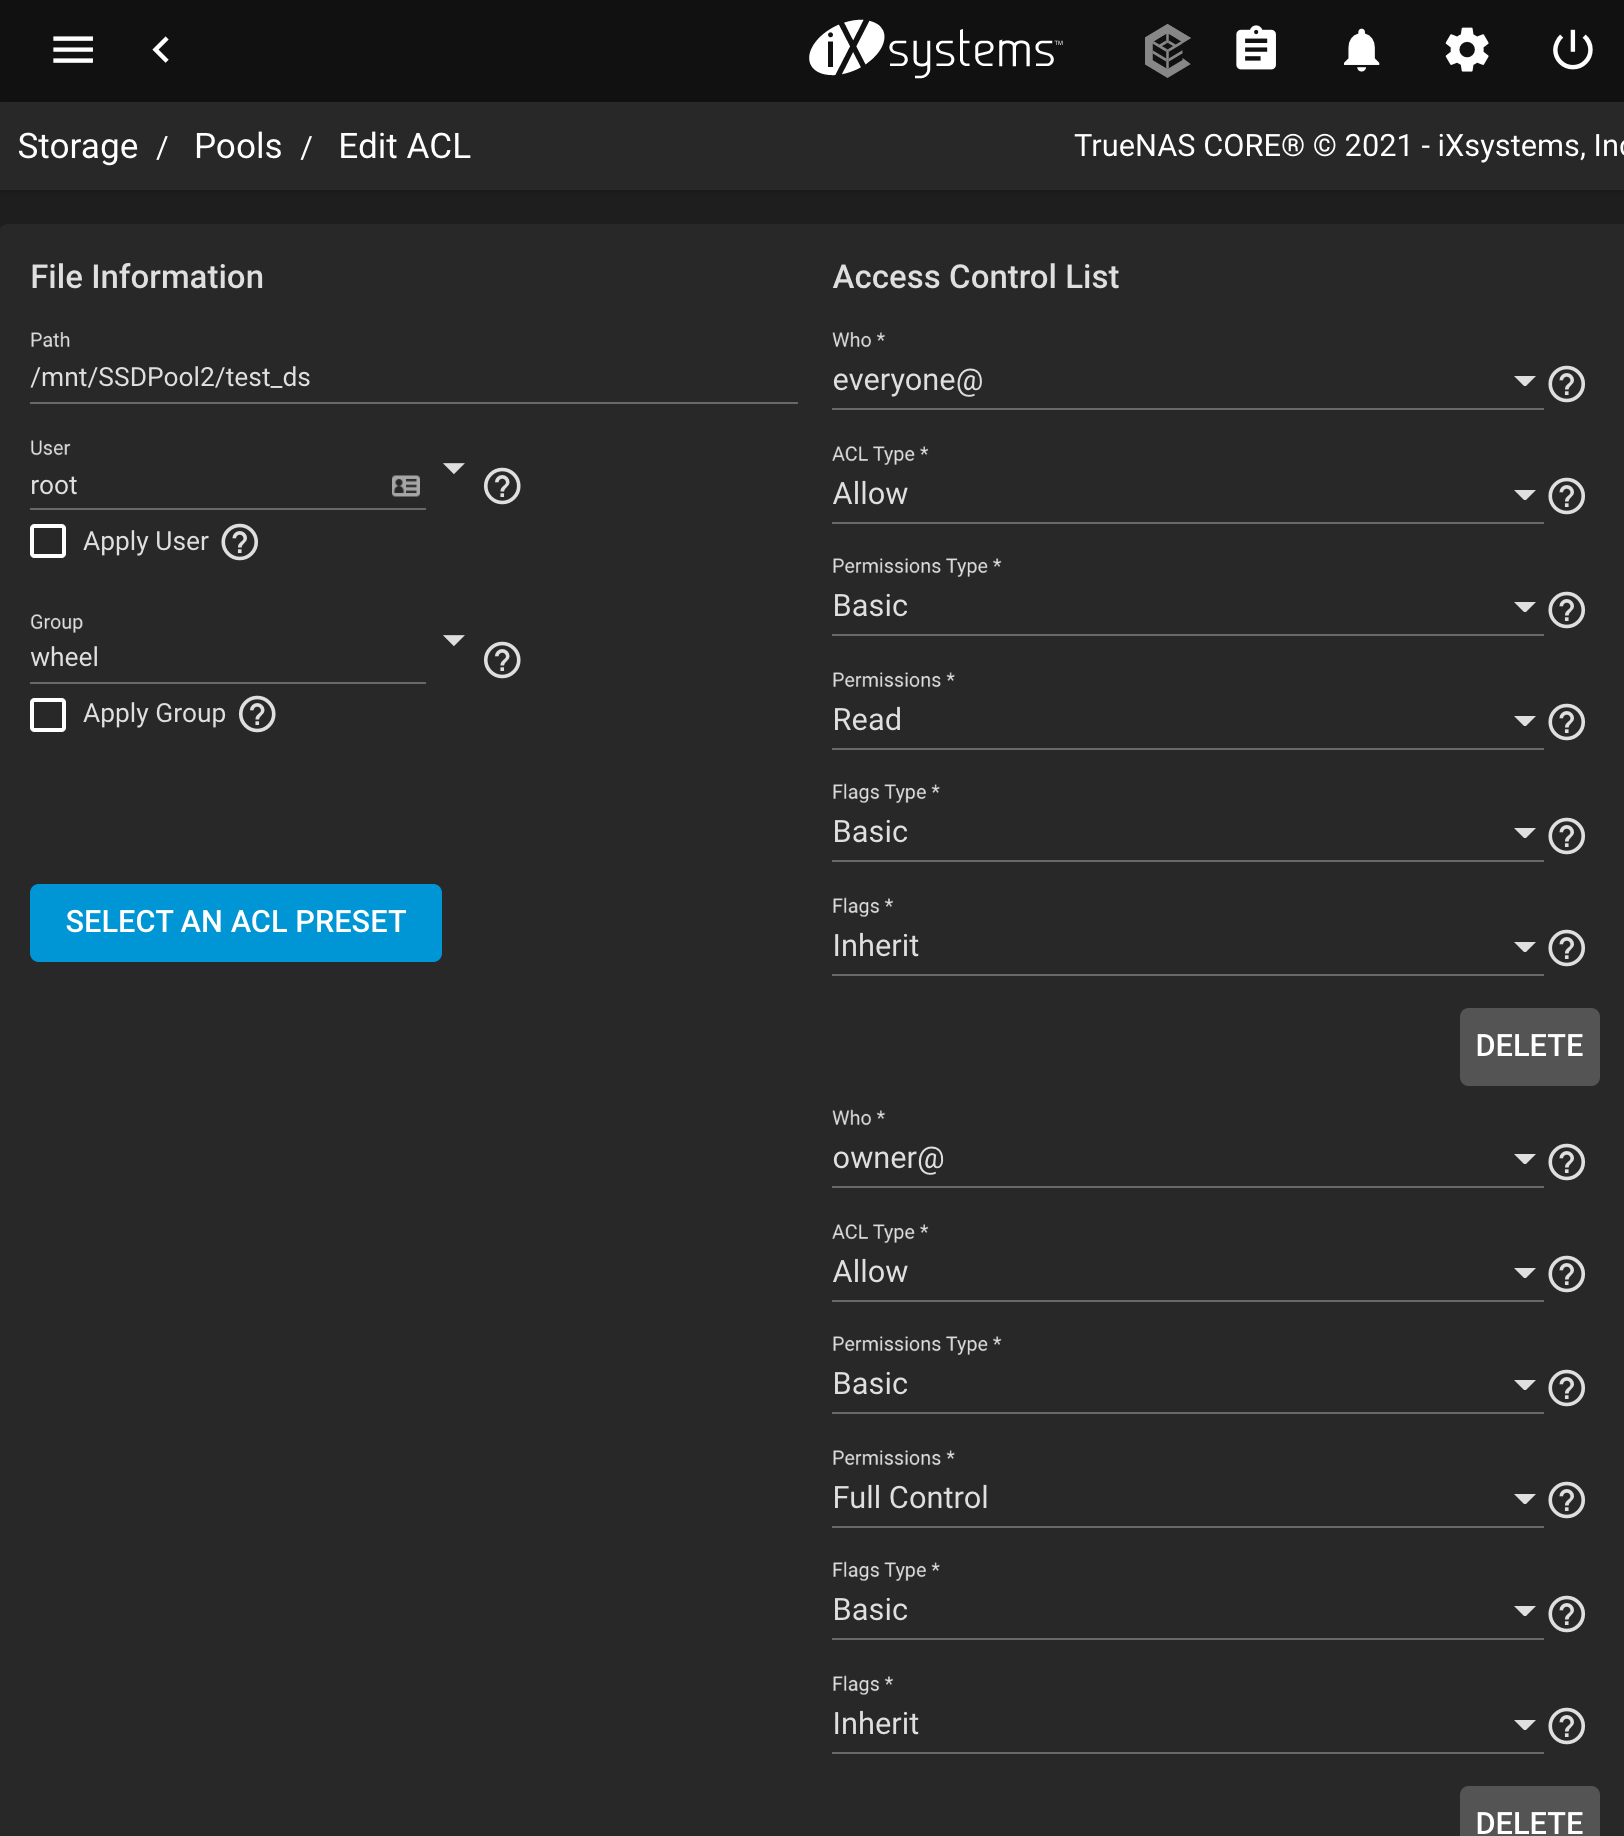
Who - Access Control Entry (ACE) user or group
- Select a specific User or Group for this entry,
- owner@ to apply this entry to the user that owns the dataset,
- group@ to apply this entry to the group that owns the dataset
- everyone@ to apply this entry to all users and groups
Basic Permissions
- Read (
r-x---a-R-c---): view file or directory contents, attributes, named attributes, and ACL. Includes the Traverse permission. - Modify (
rwxpDdaARWc--s): adjust file or directory contents, attributes, and named attributes. Create new files or subdirectories. Includes the Traverse permission. Changing the ACL contents or owner is not allowed. - Traverse (
--x---a-R-c---): Execute a file or move through a directory. Directory contents are restricted from view unless the Read permission is also applied. To traverse and view files in a directory, but not be able to open individual files, set the Traverse and Read permissions, then add the advanced Directory Inherit flag. - Full Control (
rwxpDdaARWcCos): Apply all permissions.
Ref
Snapshot
Ref
添加用户
Summary
- 所有数据都属于root
- 对于每个dataset设置ACL,以设置用户对该dataset的访问权限(包括read和write)
- 在
Shareing-smb中设置对于每一个dataset是否允许通过smb访问
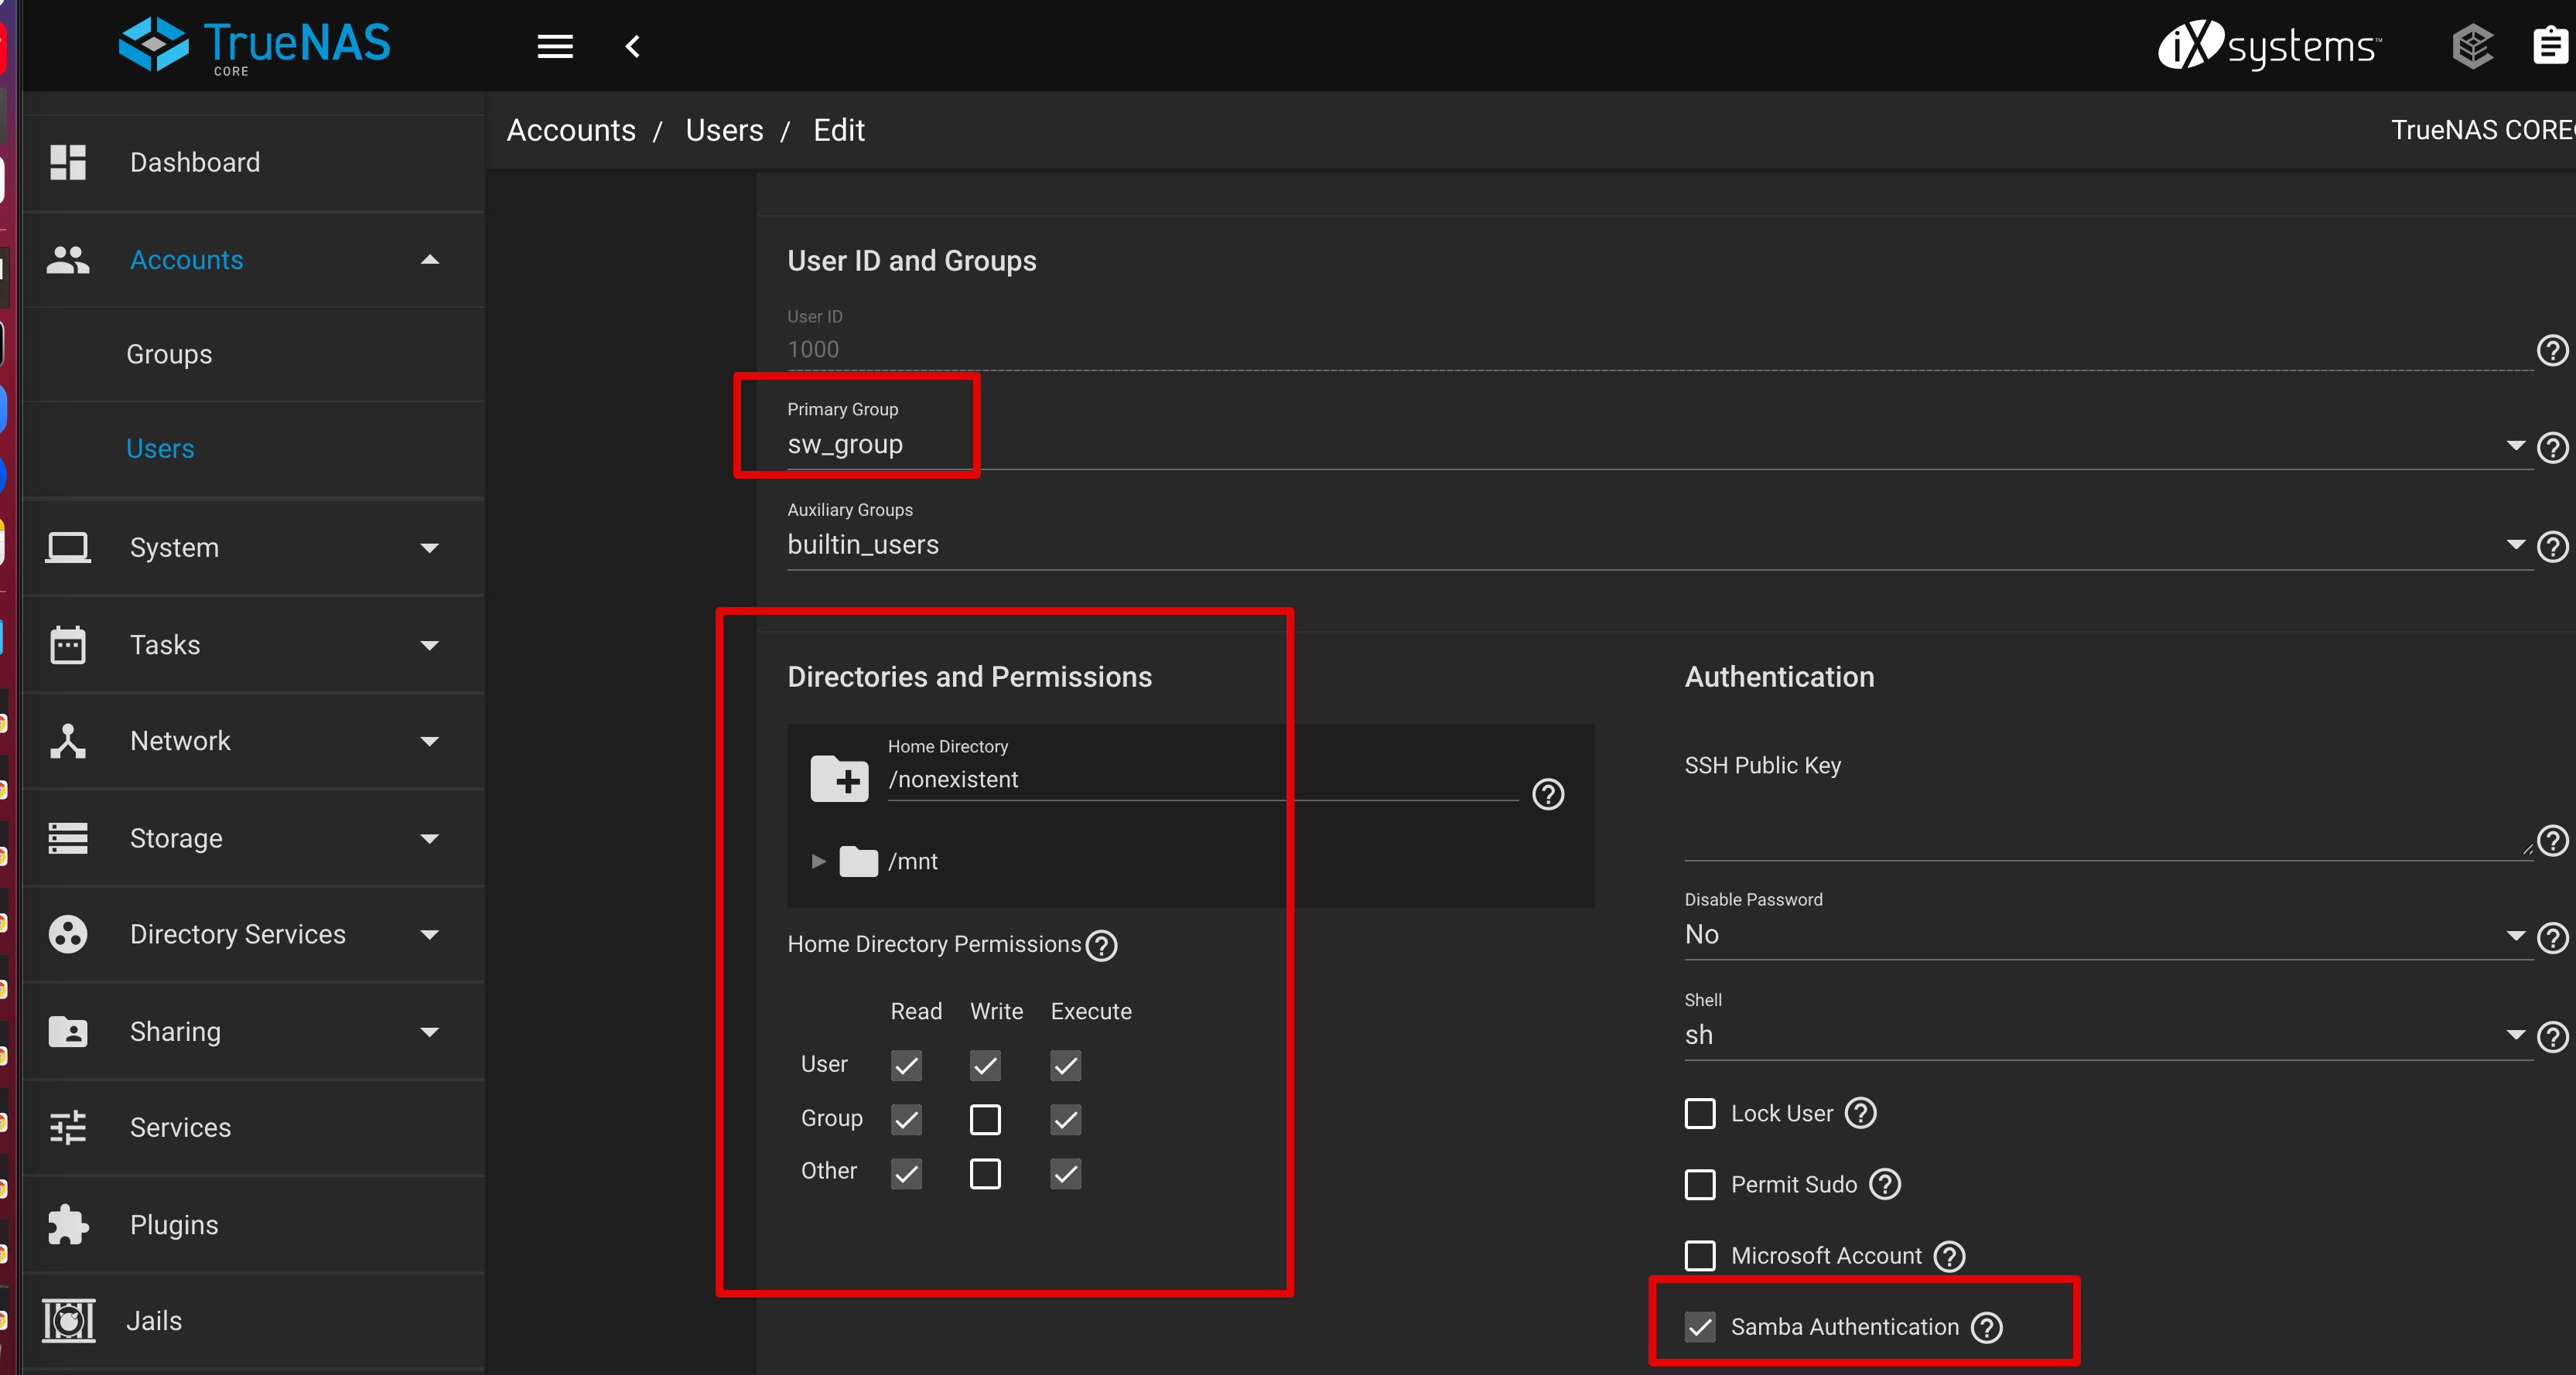
- 创建一个特定group
- 不创建该user的home 目录
- allow SMB
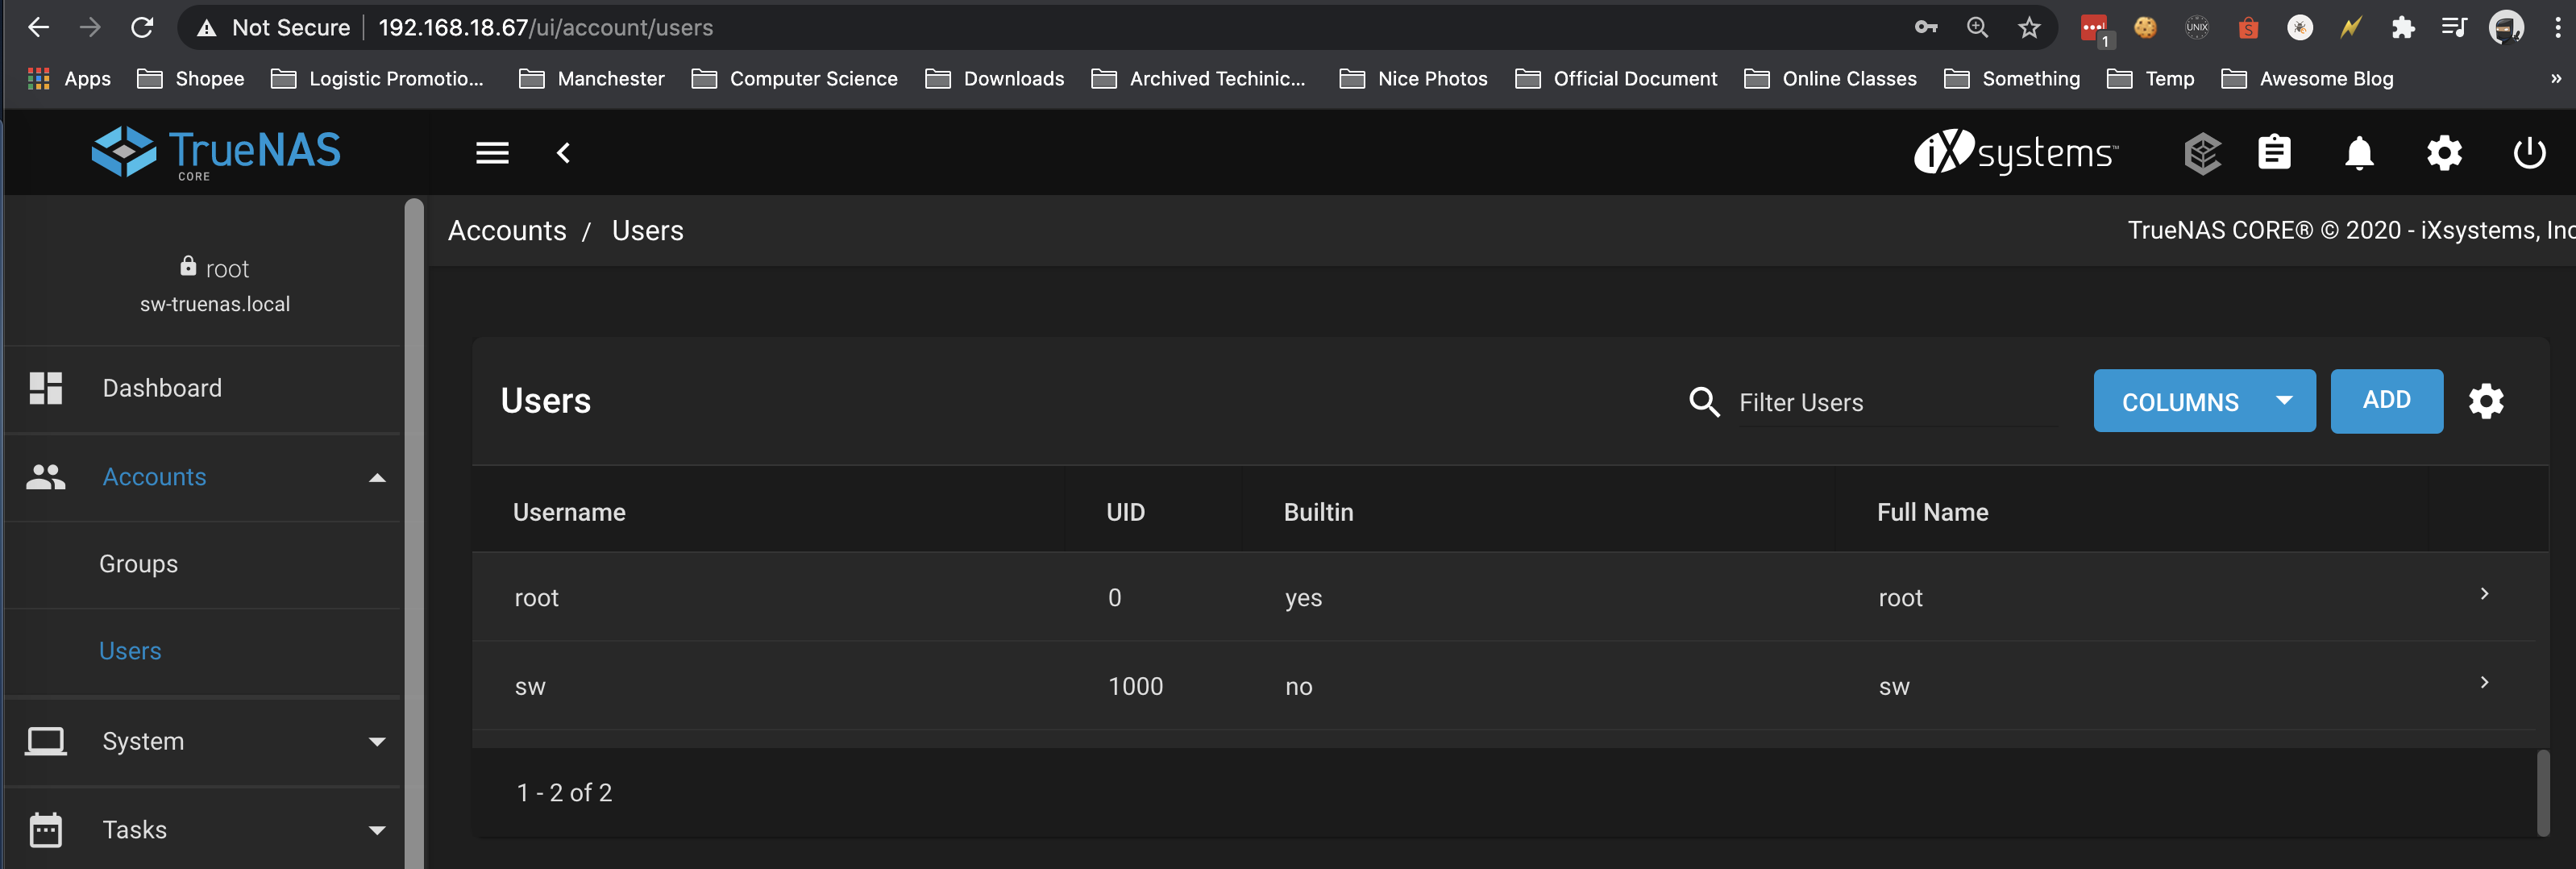
设置读写 Dataset 权限
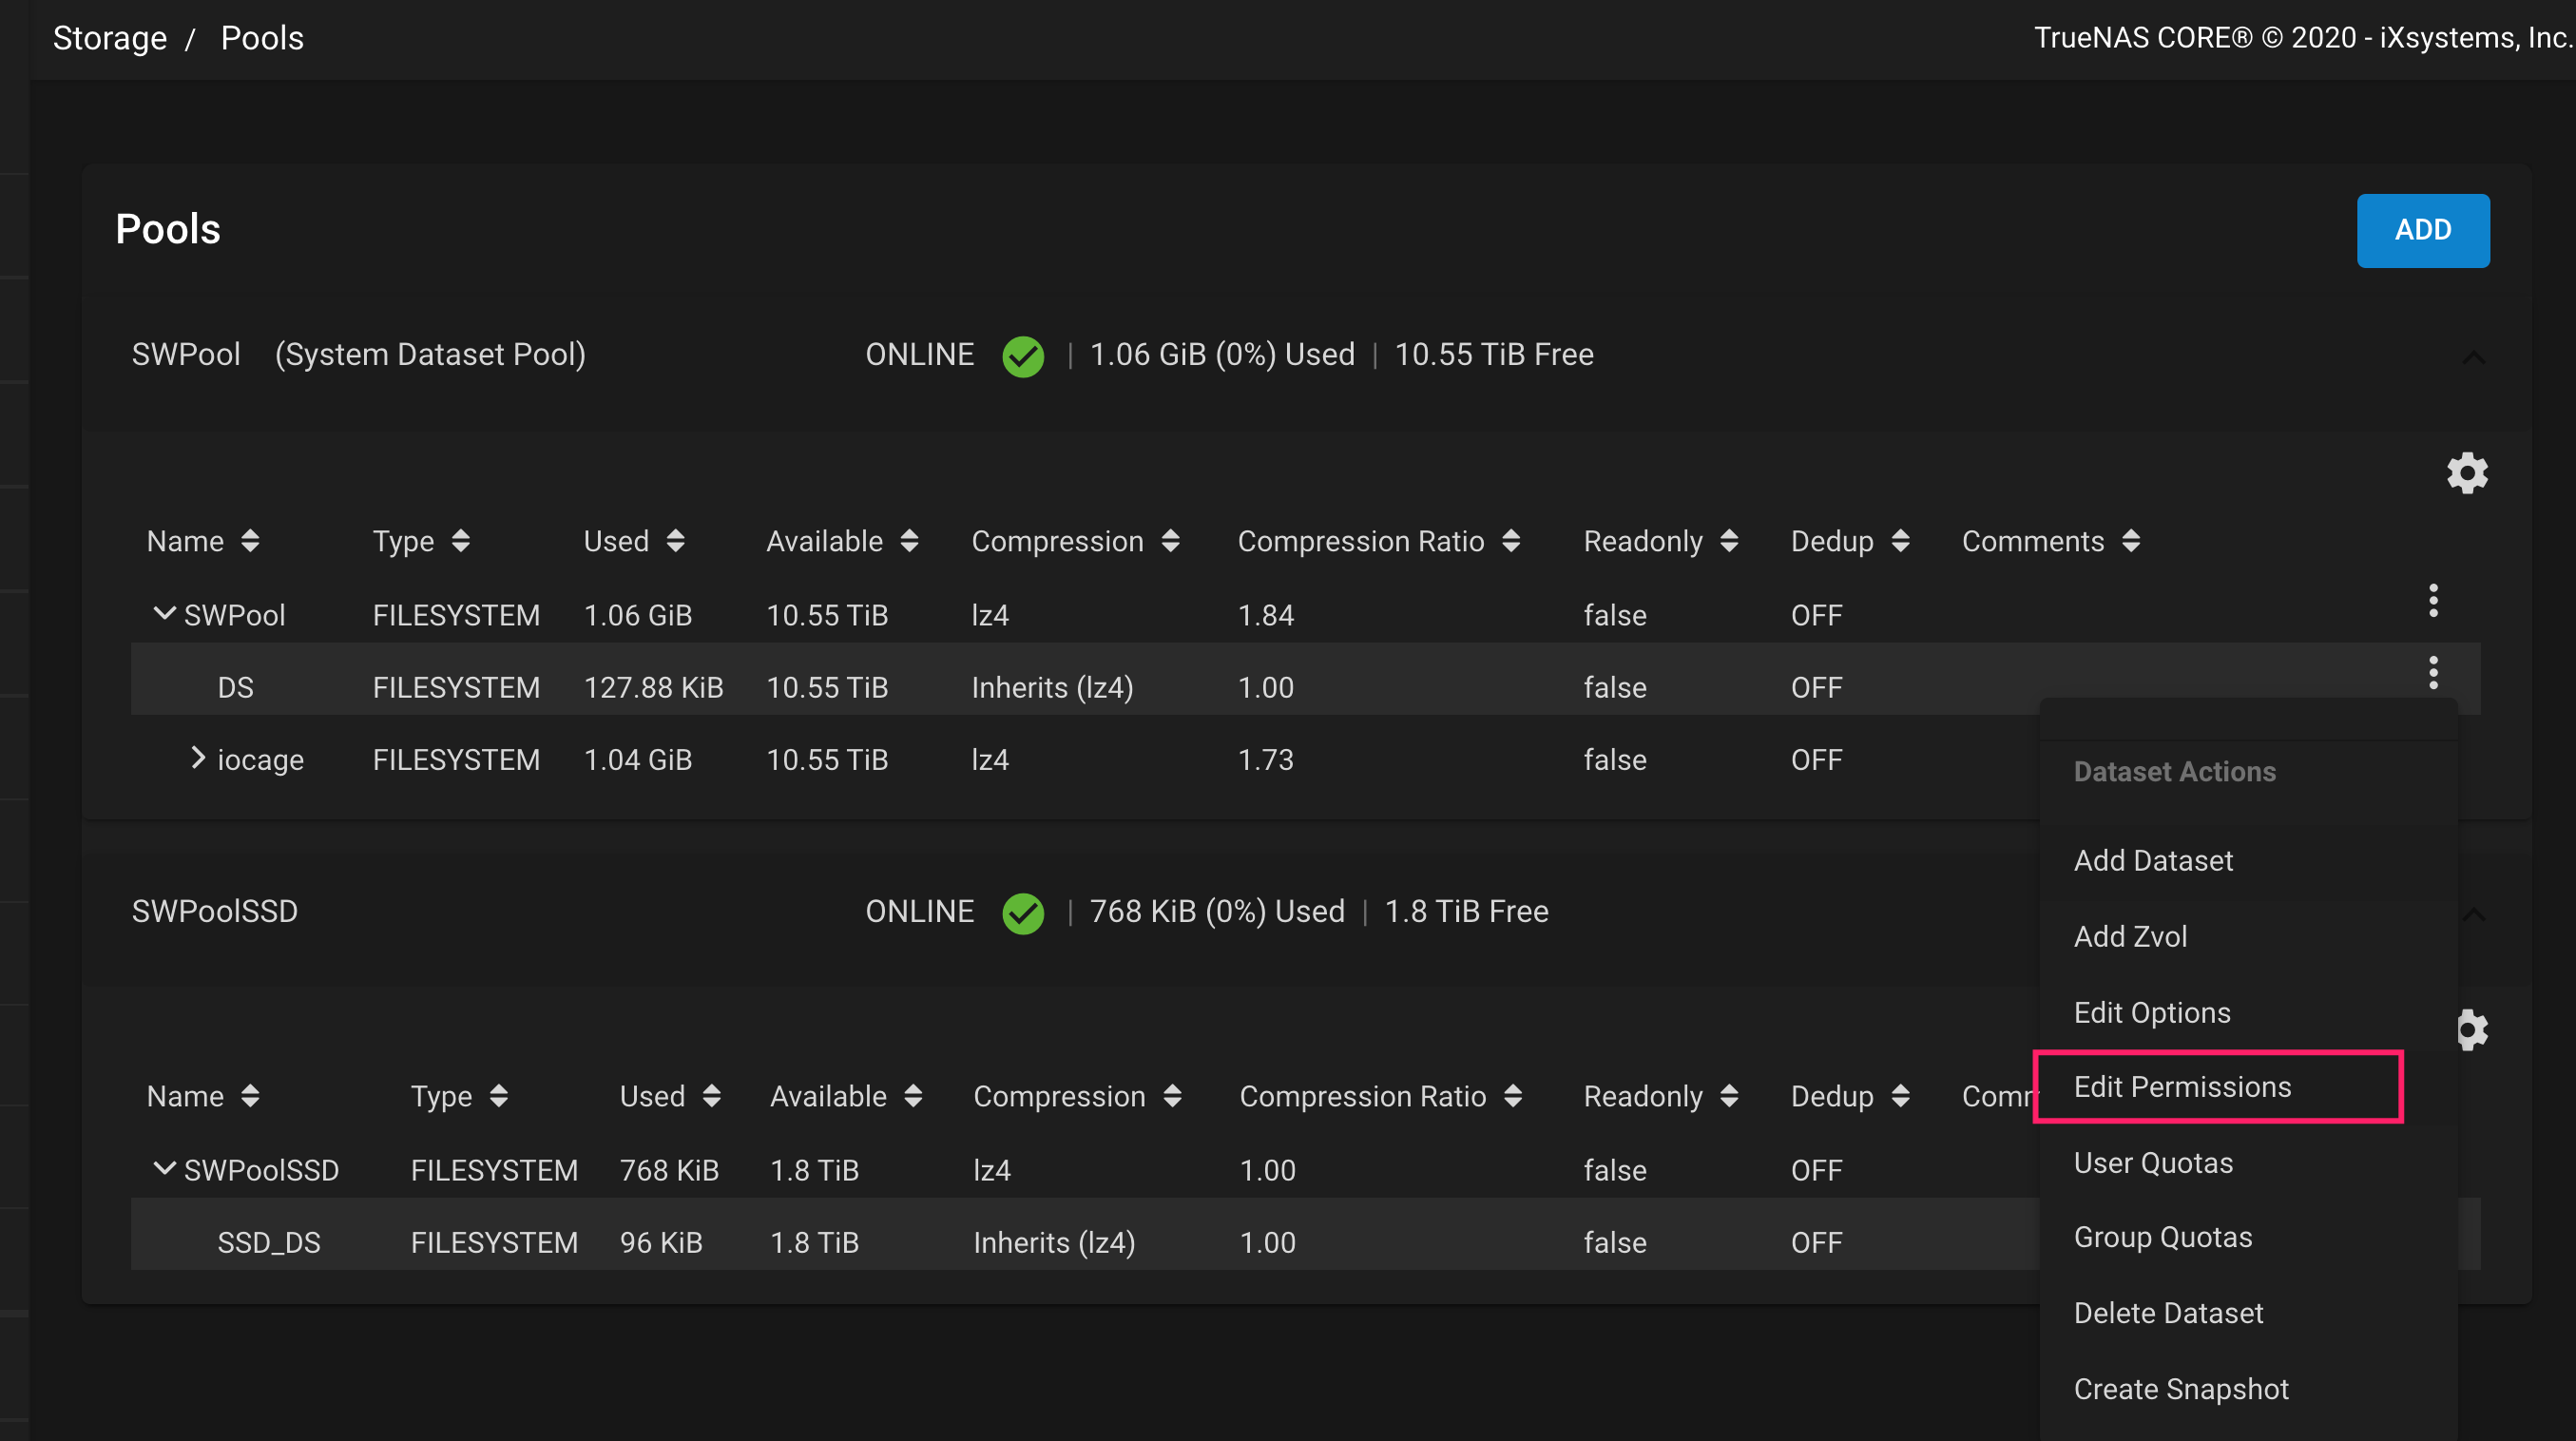
使用 USE ACL MANAGER:
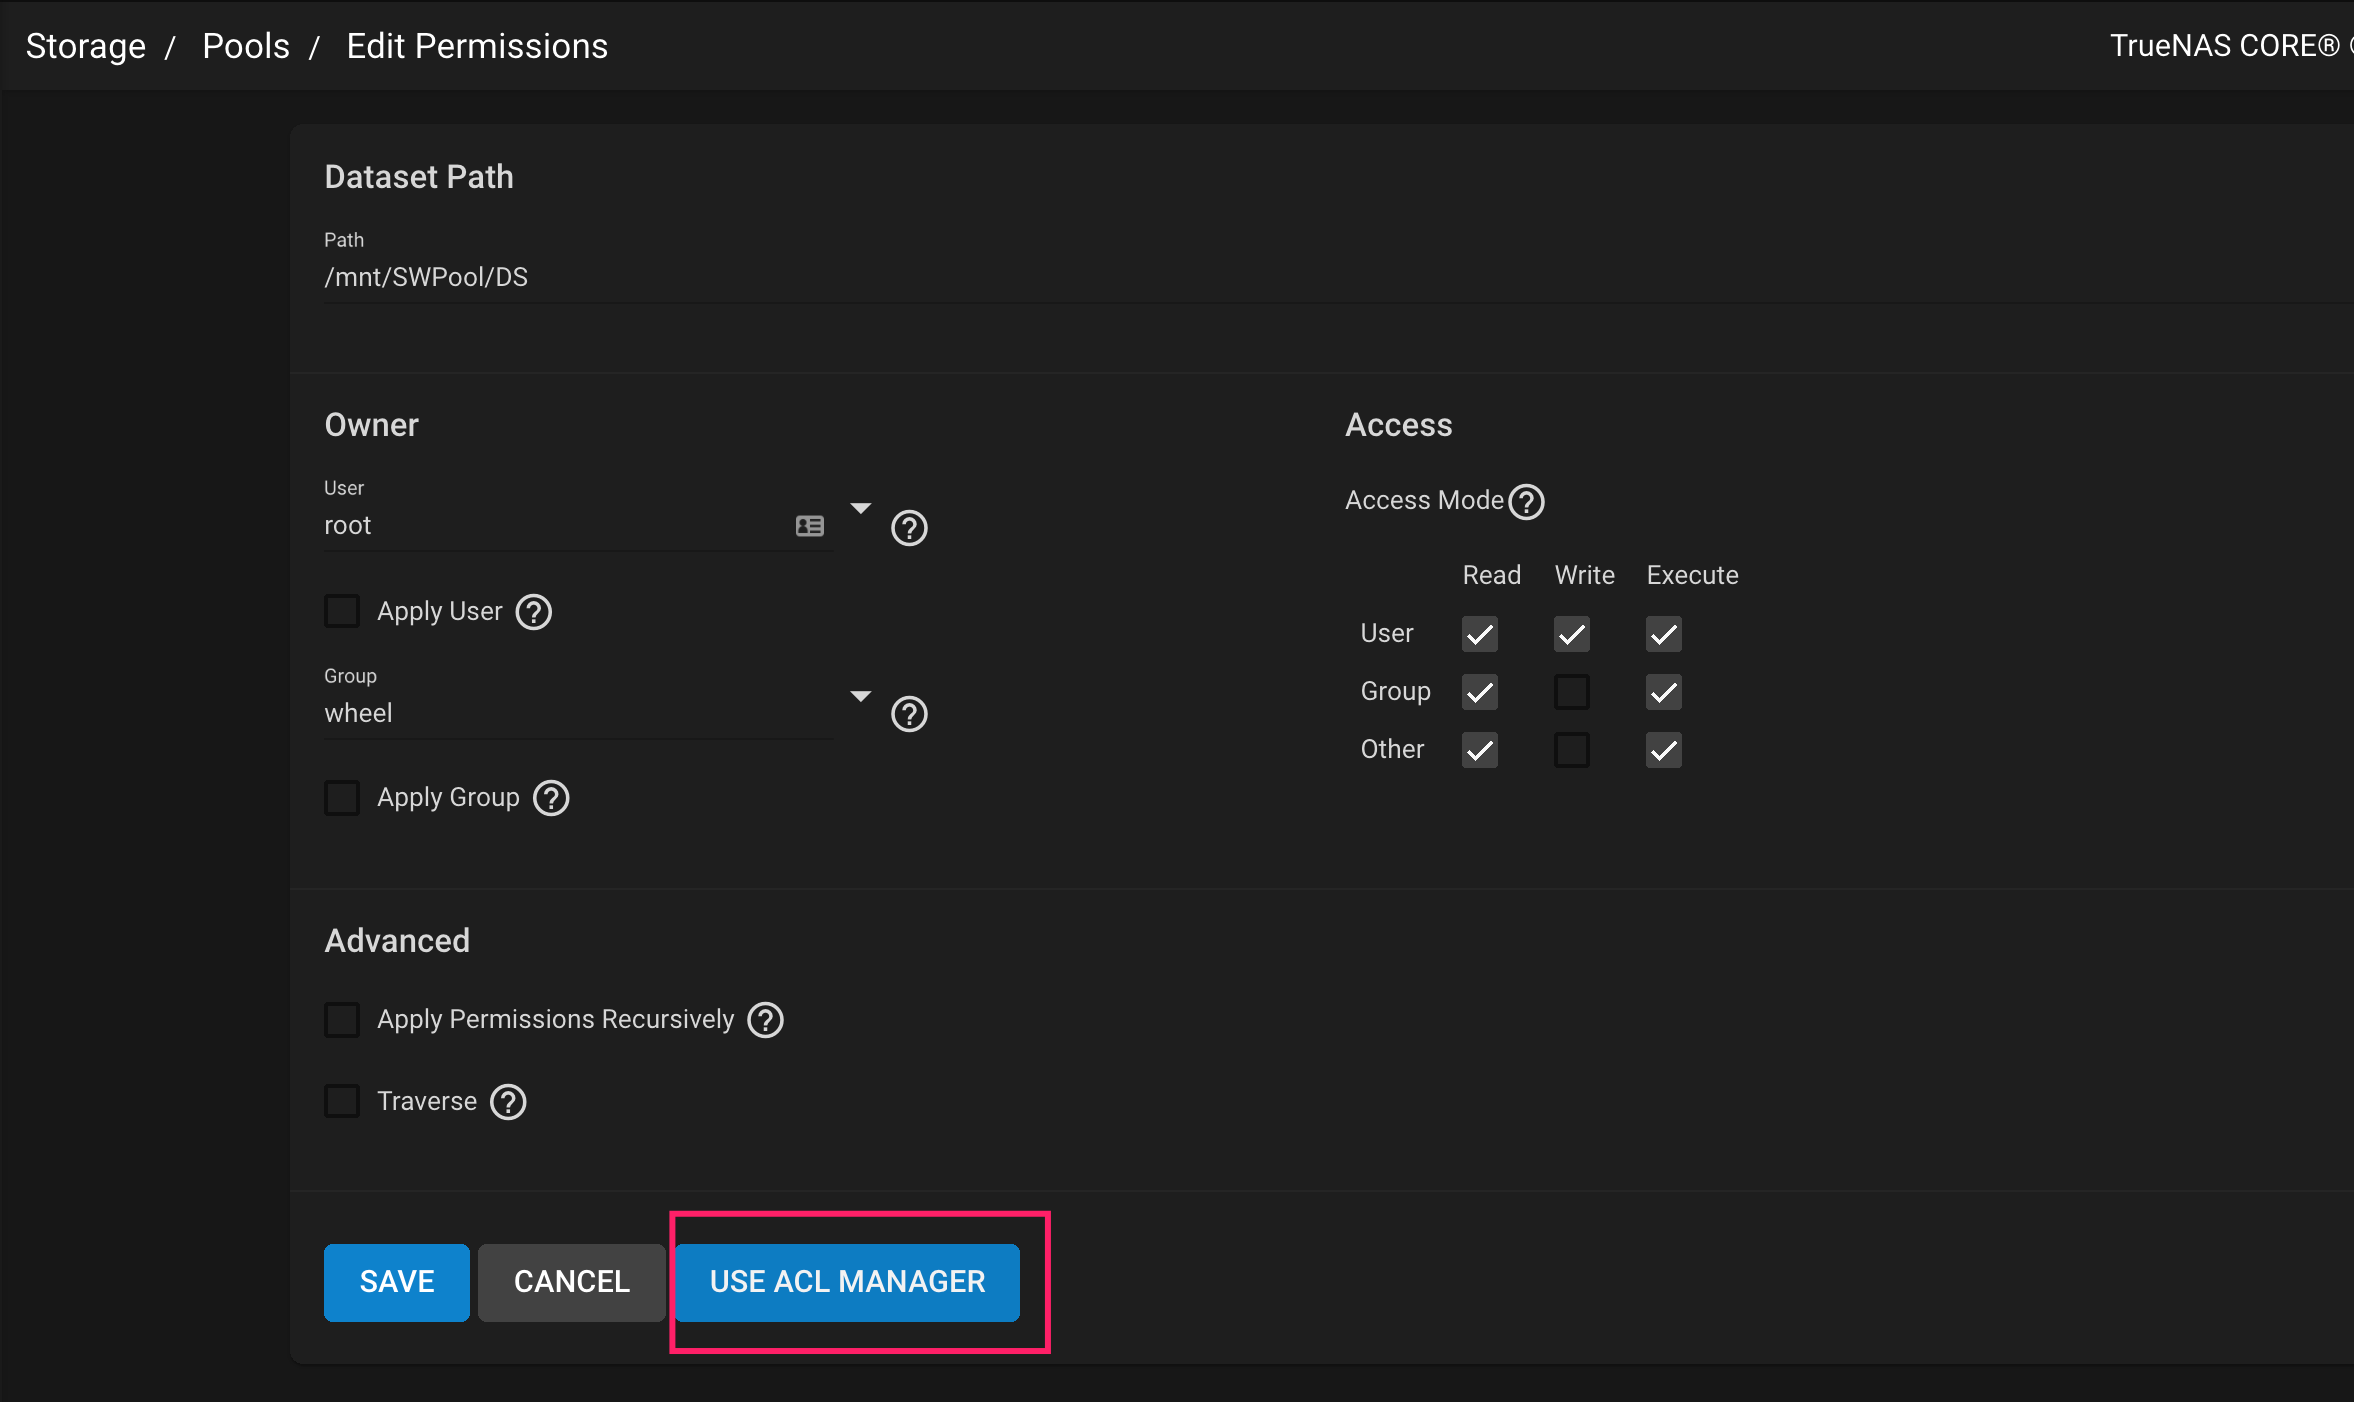
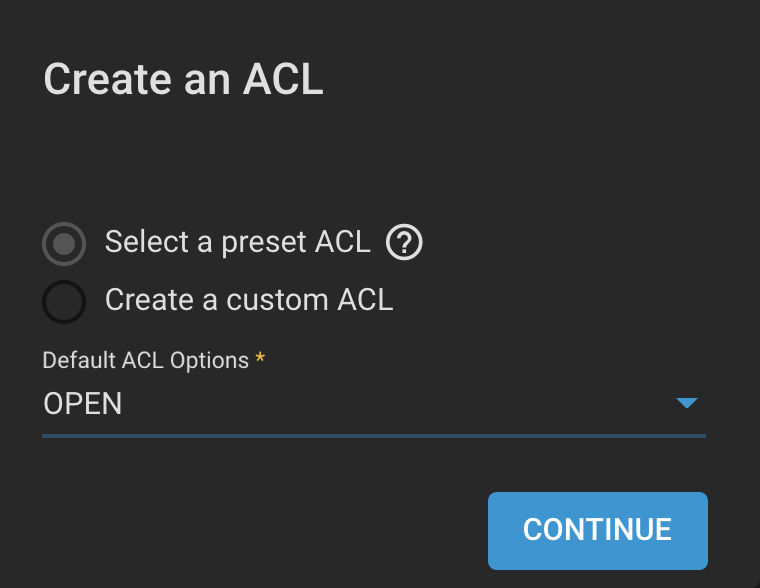
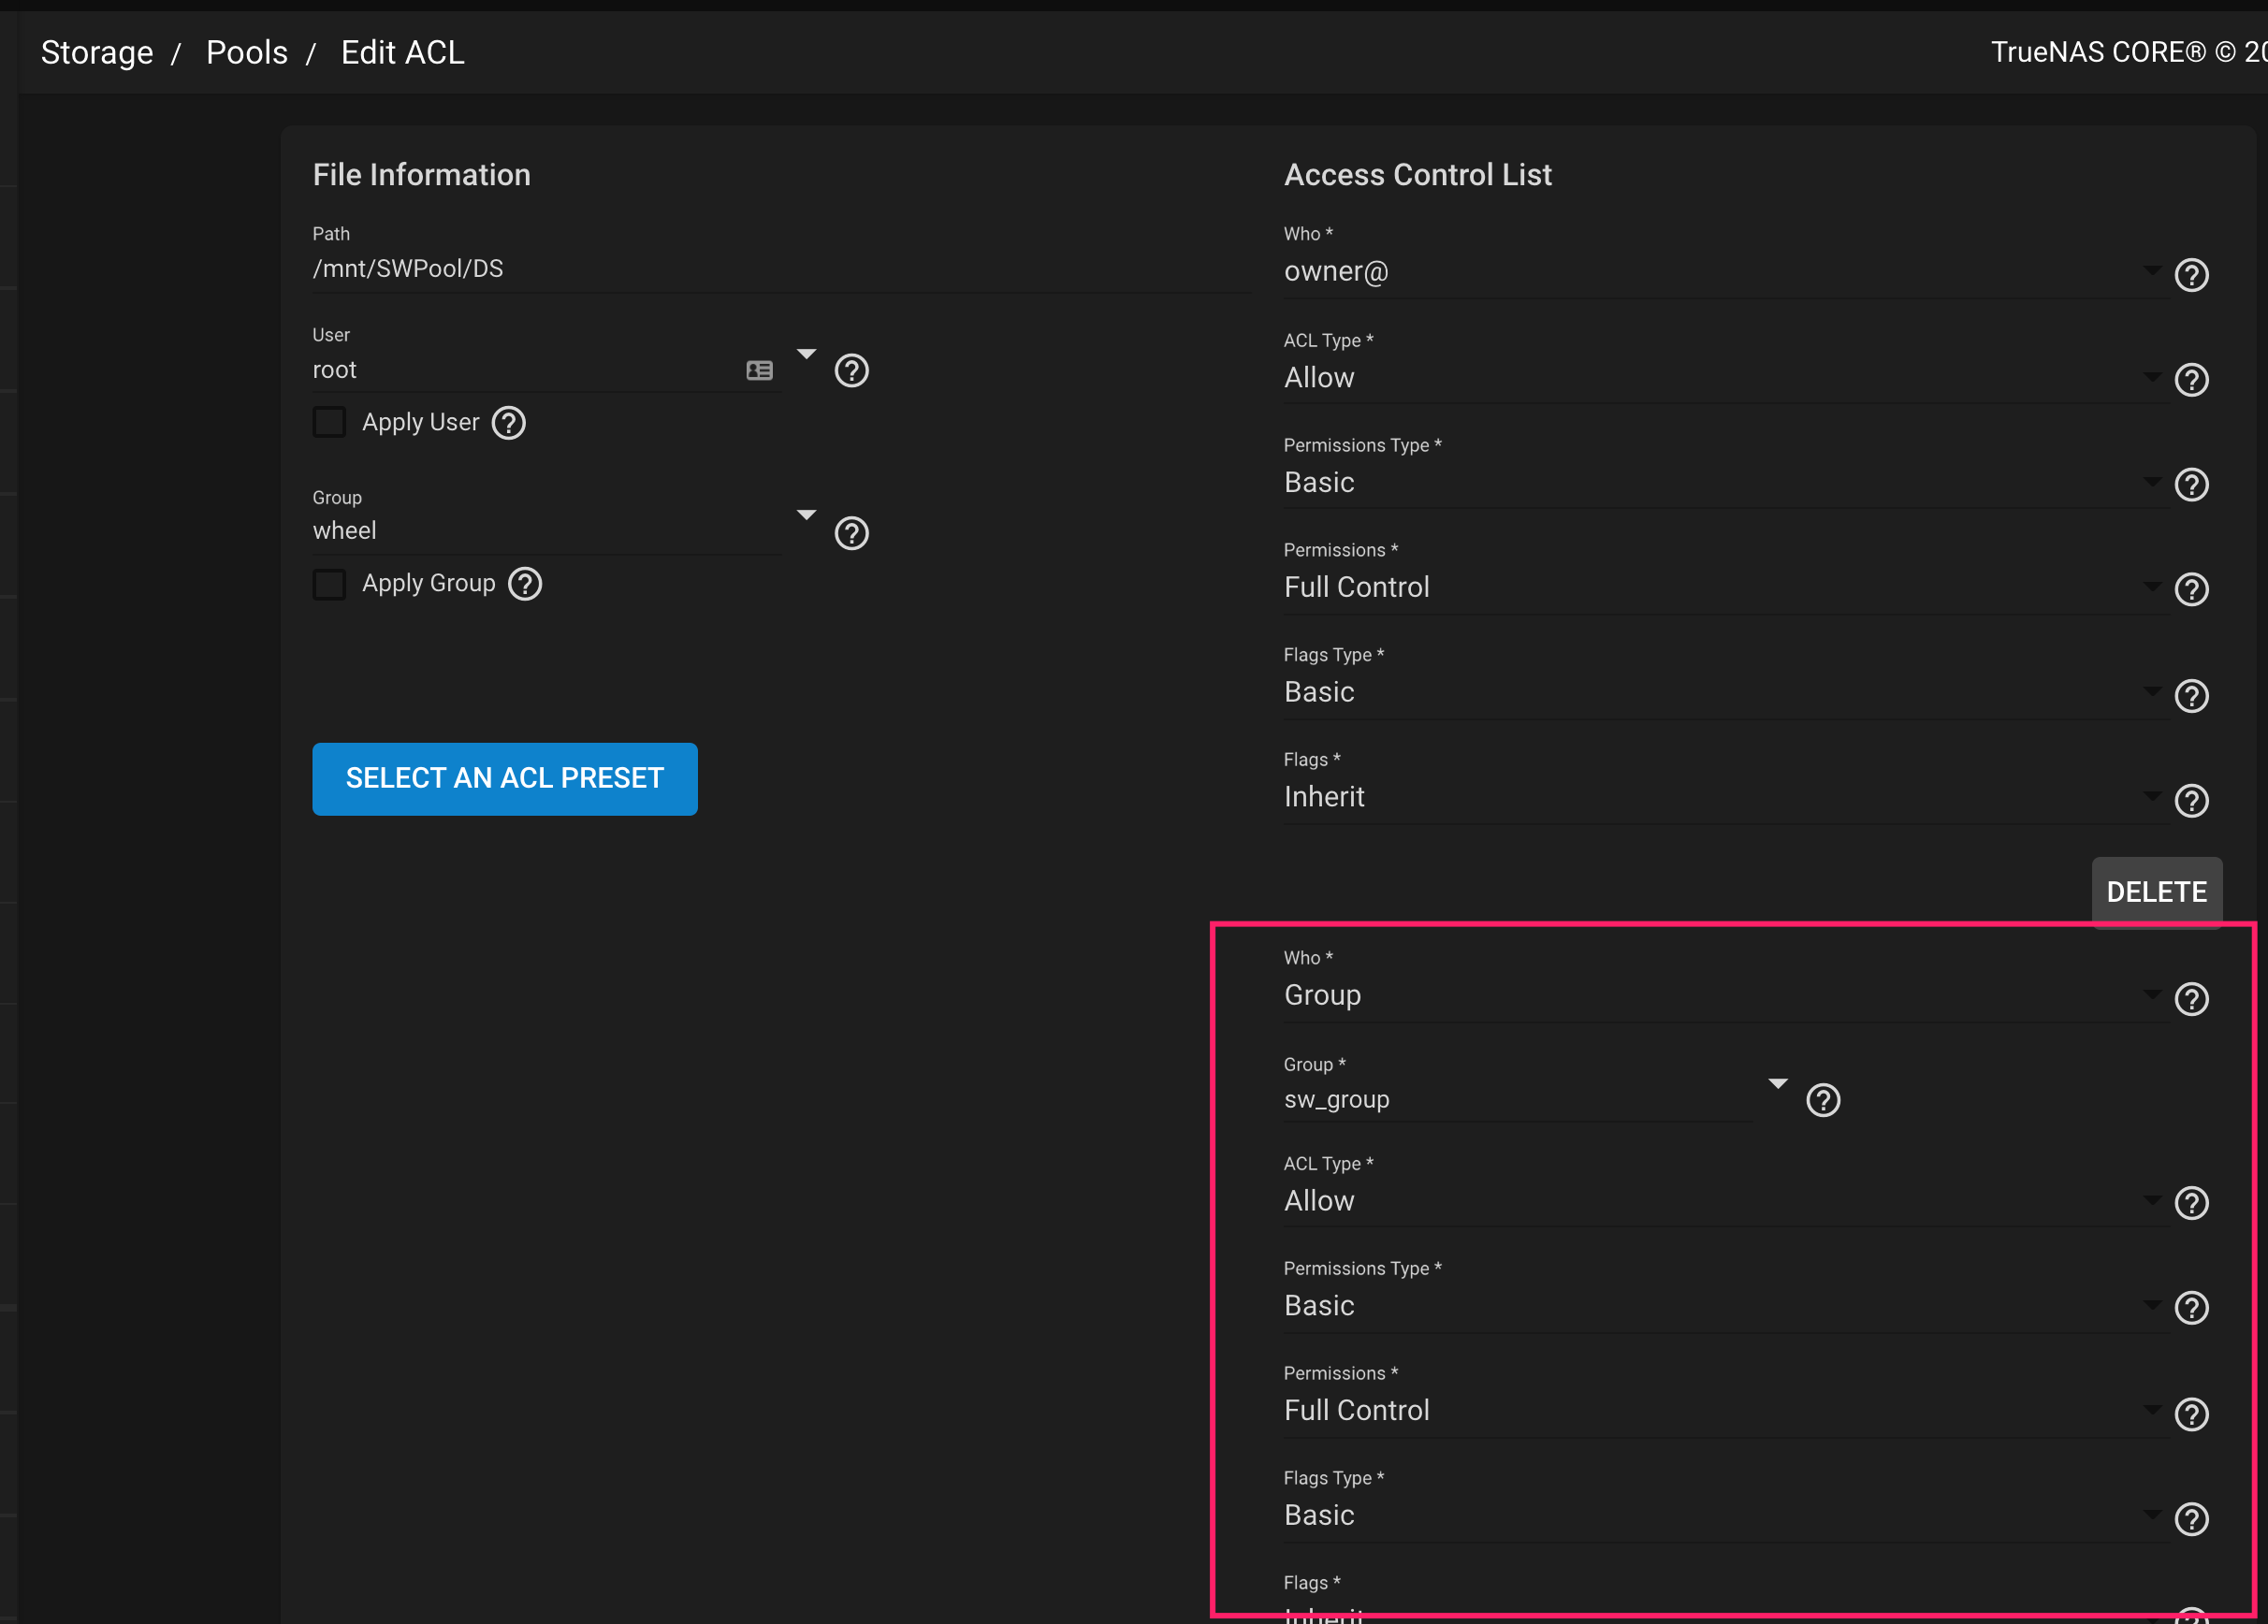
设置完成后,测试一下使用该用户通过 SMB 能否正常写入。
Ref
SMB - 连接 TrueNAS
- 在
Services中启动SMB,并选择Start Automatically - 在
Sharing的Windows Shares (SMB)中增加对于的Pool path
先不配置 perrmission,之前在 Storage - Pools 中基于 User Group 来配置。
Windows 通过 SMB 访问 TrueNAS
\\192.168.1.1

# To mount the SMB share to a drive letter on windows, open the command line and run the following command with the appropiate drive letter, computer name, and share name.
net use Z: \\computer_name\share_name /PERSISTENT:YES
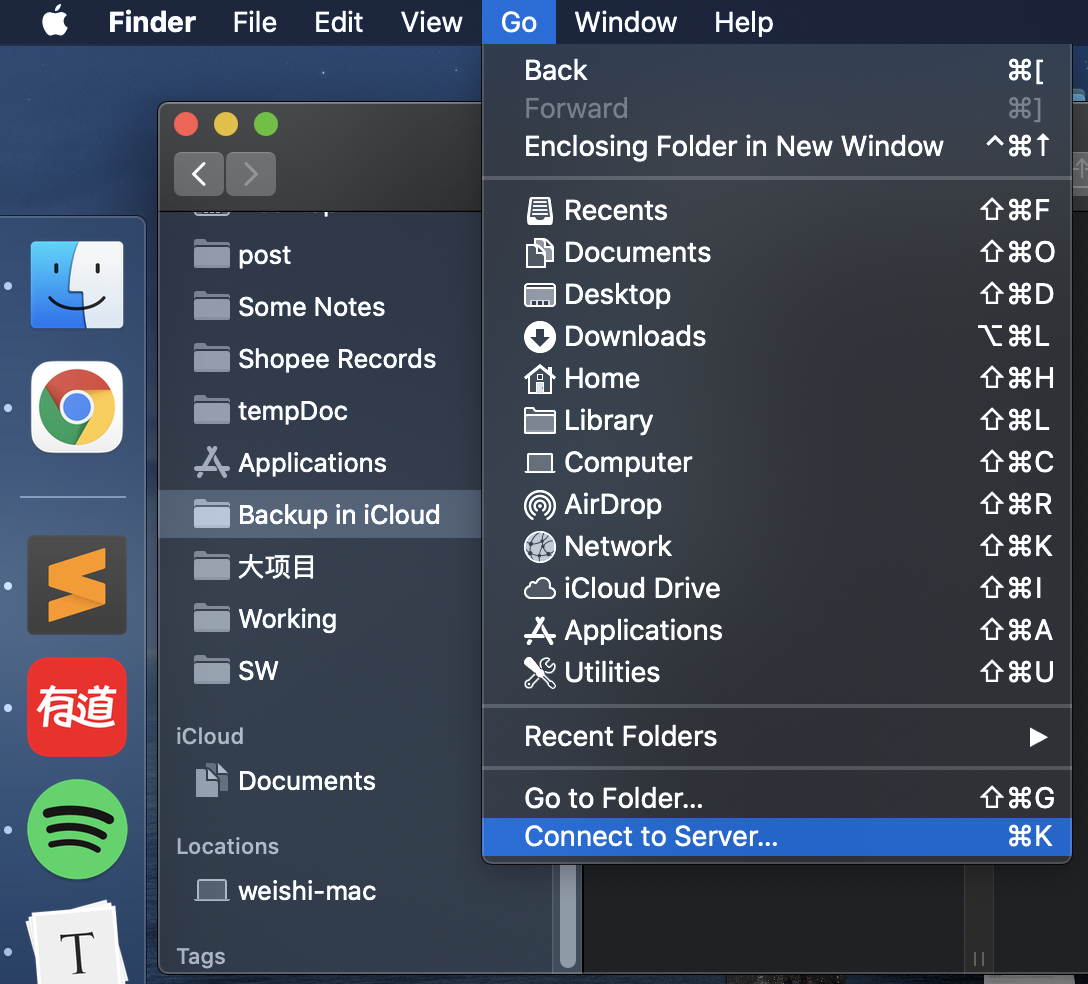
macOS 通过 SMB 访问 TrueNAS
Ref
Enable ssh
Services > SSH > Configure,打开 Start Automatically
# 通过公钥登录
$ ssh-copy-id <user>@<host>
Ref
虚拟机
Follow https://swsmile.info/post/truenas-virtual-machine/
Shell
Refer to https://swsmile.info/post/ubuntu-efficiency/
Docker
Follow https://swsmile.info/post/truenas-install-docker/#install-docker-via-convenience-script
# prometheus
$ docker run -d --restart unless-stopped -p 9090:9090 prom/prometheus
# 进入
$ docker exec -it ffb4ce7d135a sh
# grafana
$ sudo docker run -d --restart unless-stopped -p 3000:3000 grafana/grafana
安装软件
$ pkg update
Updating local repository catalogue...
pkg: file:///usr/ports/packages/meta.txz: No such file or directory
repository local has no meta file, using default settings
pkg: file:///usr/ports/packages/packagesite.txz: No such file or directory
Unable to update repository local
Error updating repositories!

# Error
$ pkg install git
Updating local repository catalogue...
pkg: file:///usr/ports/packages/meta.txz: No such file or directory
repository local has no meta file, using default settings
pkg: file:///usr/ports/packages/packagesite.txz: No such file or directory
Unable to update repository local
Error updating repositories!
We aren’t really supposed to use the shell on the main FreeNAS host, and so the pkg repositories are disabled.
If you want a shell on the machine you should look at creating a Jail (like a lightweight virtual machine) and use that for shell access.
这里,我发现一种比较 hack 的方法:
# 先在 Jail 里安装软件,比如 go
root@MyJail:~ # pkg install go git htop vim tree iperf3 vim
root@MyJail:~ # which go
/usr/local/bin/go

# 在 TreeNAS host 下找到这个 Jail 的 go 的 binary 然后运行
# 当然,你需要根据你为你的 Jail 设置的路径,来修改 mnt/SWPoolSSD/iocage/jails/MyJail
# 可以看到一切运行正常
root@sw-truenas[...ocage/jails/MyJail/root/usr/local/bin]# /mnt/SWPoolSSD/iocage/jails/MyJail/root/usr/local/bin/go version
go version go1.16.3 freebsd/amd64
Ref
- https://unix.stackexchange.com/questions/301640/how-to-pkg-upgrade-on-freenas-freebsd
- https://www.truenas.com/community/threads/new-in-freenas-unable-to-do-pkg-update.49672/
- https://digimoot.wordpress.com/2019/10/12/freenas-no-packages-available-to-install-have-been-found-in-the-repositories/
- https://www.truenas.com/community/threads/how-to-install-custom-packages-on-freenas.38234/
Jail
开启 SSH
Sure, you have to manually enable SSH in the jail, /etc/rc.conf, sshd_enable=YES
The jail STATE must be up before the SHELL option is available. If the jail is not up, start it by clicking Jails > > (Expand) > START for the desired jail. Click > (Expand), then SHELL to open a shell inside the jail:
FreeBSD 11.1-STABLE (FreeNAS.amd64) #0 0ale9f753(freenas/11-stable): FriApr 6 04:46:31 UTC 2018

Welcome to FreeBSD!

Release Notes, Errata: https://www.FreeBSD.org/releases/
Security Advisories:   https://www.FreeBSD.org/security/
FreeBSD Handbook:      https://www.FreeBSD.org/handbook/
FreeBSD FAQ:           https://www.FreeBSD.org/faq/
Questions List: https://lists.FreeBSD.org/mailman/listinfo/freebsd-questions/
FreeBSD Forums:        https://forums.FreeBSD.org/

Documents installed with the system are in the /usr/local/share/doc/freebsd/
directory, or can be installed later with: pkg install en-freebsd-doc
For other languages, replace "en" with a language code like de or fr.

Show the version of FreeBSD installed: freebsd-version ; uname -a
Please include that output and any error messages when posting questions.
Introduction to manual pages: man man
FreeBSD directory layout:     man hier

Edit /etc/motd to change this login announcement.
root@jailexamp:~ #
A root shell can also be opened for a jail using the TrueNAS Shell. Open the Shell then enter iocage console jailname.
Enable sshd:
$ sysrc sshd_enable="YES"
sshd_enable: NO -> YES
Using sysrc to enable sshd verifies that sshd is enabled. Start the SSH daemon: service sshd start
To set the jail root password, use passwd. Nothing is echoed back when using passwd:
root@jailexamp:~ # passwd
Changing local password for root
New Password:
Retype New Password:
root@jailexamp:~ #
Finally, test that the user can successfully ssh into the jail from another system and gain superuser privileges. In this example, a user named jailuser uses ssh to access the jail at 192.168.2.3. The host RSA key fingerprint must be verified the first time a user logs in.
$ ssh root@192.168.2.3
The authenticity of host '192.168.2.3 (192.168.2.3)' can't be established.
RSA key fingerprint is 6f:93:e5:36:4f:54:ed:4b:9c:c8:c2:71:89:c1:58:f0.
Are you sure you want to continue connecting (yes/no)? yes
Warning: Permanently added '192.168.2.3' (RSA) to the list of known hosts.
Password:
Every jail has its own user accounts and service configuration. These steps must be repeated for each jail that requires SSH access.
https://www.truenas.com/docs/hub/tasks/advanced/jails/
允许 Root SSH
$ vim /etc/ssh/sshd_config
Find this line:
#PermitRootLogin no
and change it to:
PermitRootLogin yes
Now Restart sshd
root@Freebsd10:~ # /etc/rc.d/sshd restart
Performing sanity check on sshd configuration.
Stopping sshd.
Waiting for PIDS: 1698.
Performing sanity check on sshd configuration.
Starting sshd.
oh-my-zsh
$ zsh --version
$ chsh -s $(which zsh)
$ sh -c "$(curl -fsSL https://raw.githubusercontent.com/ohmyzsh/ohmyzsh/master/tools/install.sh)"

# zsh-autosuggestions
$ cd ~/.oh-my-zsh/custom/plugins
$ git clone https://github.com/zsh-users/zsh-autosuggestions

# zsh-syntax-highlighting
$ git clone https://github.com/zsh-users/zsh-syntax-highlighting.git

$ vim ~/.zshrc
# add
source ~/.oh-my-zsh/custom/plugins/zsh-autosuggestions/zsh-autosuggestions.zsh
source ~/.oh-my-zsh/custom/plugins/zsh-syntax-highlighting/zsh-syntax-highlighting.zsh
Node Exporter
Refer to https://swsmile.info/post/truenas-use-node-exporter-to-monitor/
Misc
切换网络接口 for TrueNAS
# 将网线插到另一个接口

# 将旧接口关闭
$ ifconfig [old_interface] down

# 将新接口打开
$ ifconfig [new_interface] down
修改 rc.conf
You’ll have to add the line through the command line to /etc/rc.conf. To make it survive reboots, you’ll have to add it to /conf/base/etc/rc.conf as well. There is no way to make it persistent across upgrades; the change will not be saved in the FreeNAS config that you can backup.
Customized rc.conf options are stored in /tmp/rc.conf.freenas.
Ref
- https://www.truenas.com/community/threads/rc-conf.3044/
- https://www.ixsystems.com/documentation/freenas/11.3-RC1/system.html
Reference
- https://www.truenas.com/docs/hub/initial-setup/networking/ssh-connections/
- https://docs.freebsd.org/en_US.ISO8859-1/articles/linux-users/software.html
- https://linoxide.com/monitoring-2/install-iperf-test-network-speed-bandwidth/